Cloud Throw Down: Part 2 – Deployments and Instance Options


Amazon Web Services
Amazon Web Services
 

Windows Azure
Windows Azure

Previous Throw Down…

Ok, in this edition the fight gets graphic!  Let’s jump right into the bout. I’ve also been thinking about adding Rackspace or another cloud provider, so if you want me to add a comparison point, please let me know and I’ll get them added.

Deploying .NET Web Application Code into AWS and Windows Azure is done in some distinctly different ways.  There are two ways to look at this measurement;

  1. One is with a configured Web Role or VM Role in Windows Azure and already configured EC2 Instance for AWS or…
  2. A Web Role or VM Role as is and an EC2 Instance as is.

The first scenario one can deploy .NET code directly to the Web Role by simply building the code, directly from Visual Studio and just clicking on publish.  For simple web applications and even some complex ones, this is all that is required to get the app into the cloud and running.  This takes about 1-5 minutes depending on your build time and bandwidth.  I’ll measure this first method of deployment with the web role already started, so it is only the deployment being measured.  For AWS I’m making the assumption that you’ve already got an EC2 instance running with either Linux + Mono or Windows with IIS Configured and ready.  I’ll call it the…

Deploying .NET Web Applications into Ready Environments

With Windows Azure the deployment takes about 1-5 minutes from Visual Studio 2010.  With AWS EC2 using the FTP deployment it takes about 1-5 minutes.  In this particular situation, both cloud services are equal for deployment time and steps to deploy.

Rating & Winner: Deploying .NET Web Applications into Ready Environments is a tie.

…the second situation though is where things get tricky and Windows Azure has some startling advantages.  I’ll call this deployment…

Deploying a .NET Web Application into Environments As-is

This is a trickier situation.  Setup and then deployment.  For a Web Role the setup is done almost entirely in the actual .NET Web Application Project.  So it is done if the project builds and runs locally.  Nothing available is as fast as a deployment from Visual Studio 2010 straight to a Web Role.  Of course the application has to be built with this specific scenario in mind.  Total deployment time for this is 1-5 minutes.

The AWS EC2 instance you have to configure the operating system and IIS.  Installation of this and setup for the FTP server, etc, often takes several minutes.  So the first time deployment onto an EC2 instance will take a good 5-15 minutes and often requires, as any deployment to a web server does, a few minutes just to make sure all the settings are right and setup just the way you want them.  Overall, this method is not as clean as the Windows Azure Web Role deployment method.

Windows Azure however has a VM Role, similar in many ways to an AWS EC2 instance, and it has the same issues and concerns as deploying to an AWS EC2 instance for the first time.  It requires manual intervention to setup, configure, and assure that all things are in order for the specific application.

Combining these facts for deploying a .NET web application as-is leaves a few odd points.  The VM Role and AWS EC2 instance is definitely more time consuming and prone to human error for deployment because of the additional control one can have.  However the Web Role limits the ability to control many variables of the serving of content from the Web Role, it absolutely is the fastest and cleanest way to deploy a .NET Web Application.

Rating & Winner:  Deploying a .NET Web Application into Environments As-is goes to Windows Azure.

Virtual Instance Options

The next measurement is a simple one, virtual instance options.  Windows Azure has the following options available for virtual instances.

Compute Instance Size CPU Memory
Extra Small 1.0 GHz 768 MB
Small 1.6 GHz 1.75 GB
Medium 2 x 1.6 GHz 3.5 GB
Large 4 x 1.6 GHz 7 GB
Extra large 8 x 1.6 GHz 14 GB

(reference:  http://www.microsoft.com/windowsazure/compute/default.aspx)

That gives us 5 different compute instance sizes to choose from.  Amazon Web Services provides the following compute instance sizes.

Compute Instance Size CPU Memory
Micro Up to 2 EC2 Compute Units 613 MB
Small 1 Dedicated EC2 Compute Unit 1.7 GB
Large 4 EC2 compute units 3.5 GB
Extra Large 8 EC2 compute units 7 GB
High Memory Extra Large 6.5 EC2 compute units 17.1 GB
High Memory Double Extra Large 13 EC2 compute units 34.2 GB
High Memory Quadruple Extra Large 26 EC2 compute units 68.4 GB
High CPU Medium 5 EC2 compute units 1.7 GB
High CPU Extra Large 20 EC2 compute units 7 GB

Which provides us a diversified range of 9 different instance types.

Rating & Winner:  Virtual Instance Options goes to AWS.


Amazon Web Services and Windows Azure


Today’s Winners is…   Windows Azure and AWS in a tie.  The rest of my throw down series will be coming over the next week and few days.  If you have any ideas or things I should compare the two services on.

To check out more about either cloud service navigate over to:

Disclosure:  I didn’t mention it in either of the previous throw down segments about any disclosure I need to make.  I’m a .NET programmer, love and hate Microsoft at the same time, but have no real honest preference toward either cloud service.  I’m just interested in and always learning more about each technology.  Using either service when their respective capabilities meet the price, feature, or other combination that I can use.  I also do not work directly for Microsoft or Amazon.  Again, thanks for reading.  🙂

Windows Azure (w/ AWS) Presentation Coming Up

I have a presentation coming up next week on the 10th.  If you’re interested in cloud computing, specifically around storage then you should tune in.  I’ll be covering the basics and some of the architectural ideas, uses, and more around Windows Azure Storage, and the comparable Amazon Web Services storage services.  I’ll also be noting a few of my ongoing projects that you might, if you’re into cloud bits, get a kick out of or want to join.

To tune in to the presentation swing over to the https://www.clicktoattend.com/invitation.aspx?code=147809 link.  There is registration information on the page.  The presentation will technically start at 1 PM PST on the 10th of next week and run until about 1:45pm.  We’ll make the meeting live about 12:45 for early arrival and after about 1:45 there will be a question and answer session.  I hope to have a good bit of conversation afterwards discussing the uses, architectures, and patterns around storage use with cloud services.

I hope you’ll join me.  -Adron

Cloud Throw Down: Part 1 – Operating Systems & Languages


Amazon Web Services
Amazon Web Services


Windows Azure
Windows Azure

The clouds available from Amazon Web Services, Windows Azure, Rackspace and others have a few things in common.  They’re all providing storage, APIs, and other bits around the premise of the cloud.  They all also run on virtualized operating systems.  This blog entry I’m going to focus on some key features and considerations I’ve run into over the last year or so working with these two cloud stacks.  I’ll discuss a specific feature and then will rate it declaring a winner.

Operating System Options

AWS runs on their AMI OS images, running Linux, Windows, or whatever you may want.  They allow you to execute these images via the EC2 instance feature of the AWS cloud.

Windows Azure runs on Hyper-V with Windows 2008.  Their VM runs Windows 2008.  Windows Azure allows you to run roles which execute .NET code or Java, PHP, or other languages, and allow you to boot up a Windows 2008 OS image on a VM and run whatever that OS might run.

Rating & Winner: Operating Systems Options goes to Amazon Web Services

Development Languages Supported

AWS has a .NET, PHP, Ruby on Rails, and other SDK options.  Windows Azure also has .NET, PHP, Ruby on Rails, and other SDK options.  AWS provides 1st class citizen support and development around any of the languages, Windows Azure does not but is changing that for Java.  Overall both platforms support what 99% of developers build applications with, however Windows Azure does have a few limitations on non .NET languages.

Rating & Winner: Development Languages Supported is a tie. AWS & Windows Azure both have support for almost any language you want to use.

Operating System Deployment Time

AWS can deploy one of hundreds of any operating system image with a few clicks within the administration console.  Linux instances take about a minute or two to startup, with Windows instances taking somewhere between 8-30 minutes to startup.  Windows Azure boots up a web, service, or CGI role in about 8-15 minutes.  The Windows Azure VM Role reportedly boots up in about the same amount of time that AWS takes to boot a Windows OS image.

The reality of the matter is that both clouds provide similar boot up times, but the dependent factor is which operating system you are using.  If you’re using Linux you’ll get a boot up time that is almost 10x faster than a Windows boot up time.  Windows Azure doesn’t have Linux so they don’t gain any benefit from this operating system.  So really, even though I’m rating the cloud, this is really a rating about which operating system is faster to boot.

Rating & Winner: Operating System Deployment Time goes to AWS.


Amazon Web Services
Amazon Web Services


Today’s winner is hands down AWS. Windows Azure, being limited to Windows OS at the core, has some distinct and problematic disadvantages with bootup & operating system support options.  However I must say that both platforms offer excellent language support for development.

To check out more about either cloud service navigate over to:

That’s the competitions for today.  I’ll have another throw down tomorrow when the tide may turn against AWS – so stay tuned!  🙂

#wp7/#wp7dev + Amazon Web Services (AWS) and Windows Azure

I got to mess around with the Windows Phone 7 SDK finally over the last few weeks (Twitter hashtags #wp7 and #wp7dev).  The first few things I noticed was that there are a lot of missing parts to it.  Namely the calendar control I fussed about well over a month ago in Windows Phone 7 Calendar Control.  Even with the missing elements I kept wondering what I could build that would be useful and might be a good open source project?  I finally stumbled on the idea that I’d roll a few of my points of study together into one;  Windows Azure, Amazon Web Services, and Windows Phone 7.  With that stumbling notion I navigated straight over to Codeplex and rolled a new project!

With that written, I hope I can get some of you cloud afficionados and gurus to put in a few hours a month to help build a rockin’ open source mobile admin app!  If you’re interested please e-mail and I’ll get you setup on the project ASAP!  🙂

Here are my first few user stories just to get things started.  If you think of other functionality, please feel free to add that to the comments below or to the tracking section on the Codeplex Project.

http://wp7cloudadmin.codeplex.com/

What You Need and Want With Windows Azure Part II

One of the most useful tools to use in Windows Azure Development is the Windows Azure MMC.  The Microsoft Management Console, or MMC, is the management console that many of the Windows Server Management interfaces can plug into.  The Windows Azure Team has put together the Windows Azure specific MMC Console Plugin that is available for download on Microsoft MSDN Code Site at http://code.msdn.microsoft.com/windowsazuremmc.


Windows Azure MMC Code Site


When you navigate to the page, click on the tab for downloads and you will find three different files;

  • WindowsAzureMMC.exe
  • PerfMon-Friendly Log Viewer Plugin
  • PerfMon-Friendly Log Viewer Plugin (Source Only)

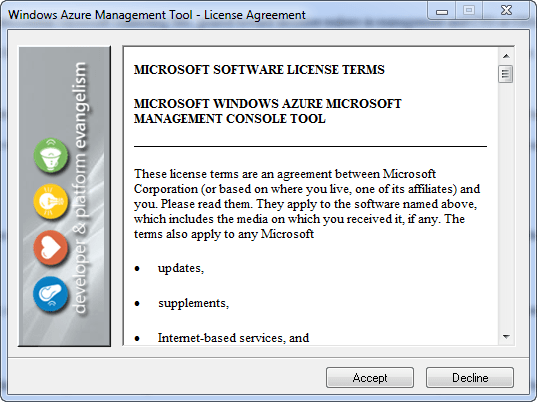
The main file you’ll need to download is the WindowsAzureMMC.exe file.  Once this file is downloaded, run the executable.  An installation wizard will appear, just click next and step through each of the steps accepting any defaults.


Windows Azure Management Tool Installation


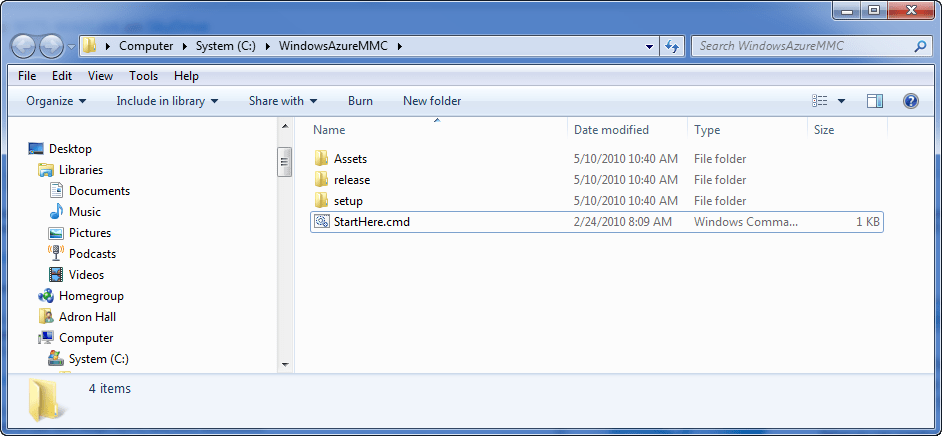
Once the executable runs it should pop up a Windows Explorer Window, if not navigate to where the files where just installed (unzipped) to.  By default the installer places them in C:\WindowsAzureMMC\.  Find the file StartHere.cmd located in the installation directory and fun the file.


StartHere.cmd
StartHere.cmd


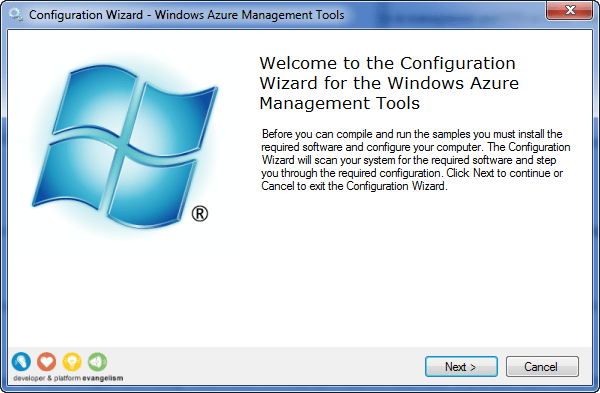
When the file is executed a DOS prompt will flicker, and another configuration wizard titled Windows Azure Management Tools will appear.


Configuration Wizard for the Windows Azure Management Tools


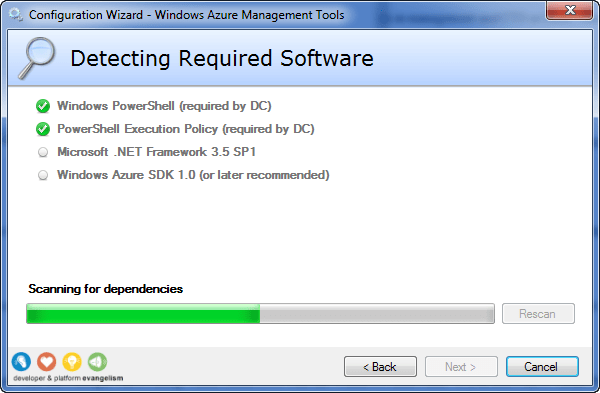
Click next and the installation will start, checking each of the dependencies required to execute the MMC.


Detecting Required Software


Continue to click any next prompts, and then you will have the Windows Azure MMC Console open once the StartHere.cmd finishes executing.  Click close on the configuration wizard.


Installation Completed


The MMC will now be displayed on screen as shown below.


Windows Azure Management Tool (MMC)


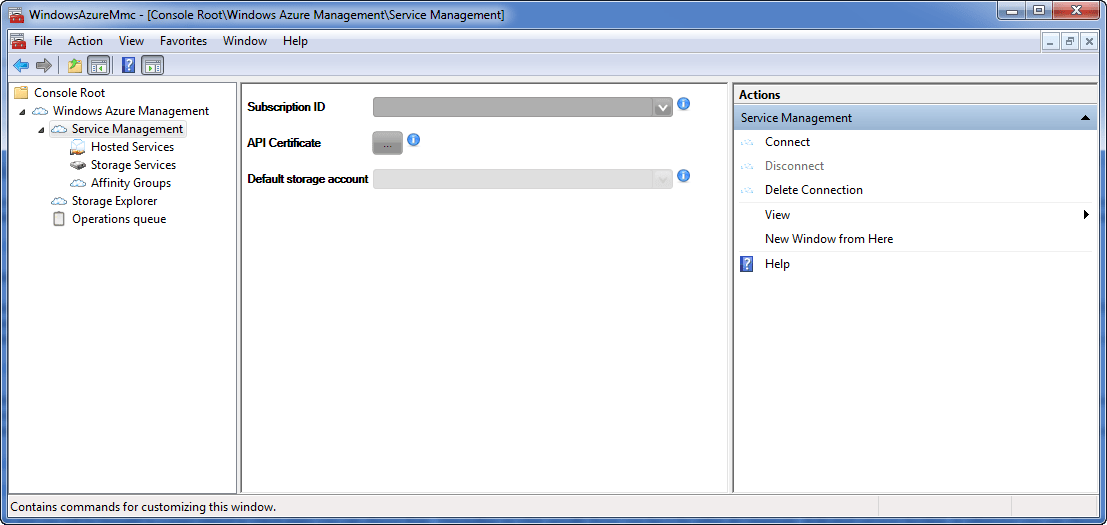
Open the Windows Azure Management section by clicking on the small tree view arrow on the left hand side.  The tree view will open up to a Service Management Node with a Hosted Services, Storage Services, and Affinity Groups listed underneath the node.  Select the actual Service Management Node so that the middle window shows the connection form shown here.


Windows Azure MMC Services Management Node Connection


Now navigate back to Windows Azure Platform Web Interface (http://windows.azure.com).  Click on the project displayed on the main screen to select it.


Windows Azure Portland Interface


When the follow page displays, click on the Account tab at the center top of the page.


Windows Azure Project


When the Account Page finishes rendering look at the very bottom to locate the subscription ID.


Windows Azure Project Account Properties


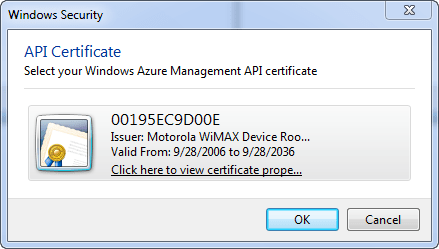
Enter the subscription ID into the form.  Now click on the ellipsis button on the form so the certificates that are available are displayed.


API Certificate
API Certificate


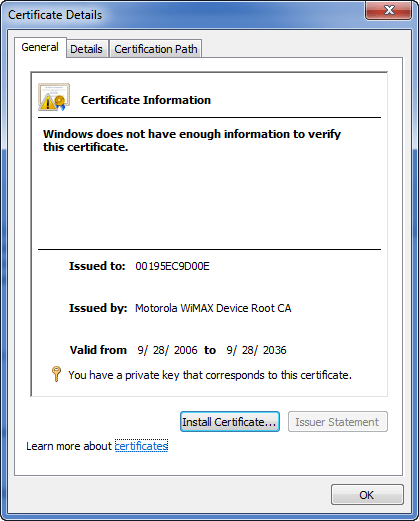
Click on the underlined link on the certificate you want to use (sometimes there are a few options, depending on what is installed on the machine already).  A properties dialog should appear when you click on the underlined link button.


Certificate Details
Certificate Details


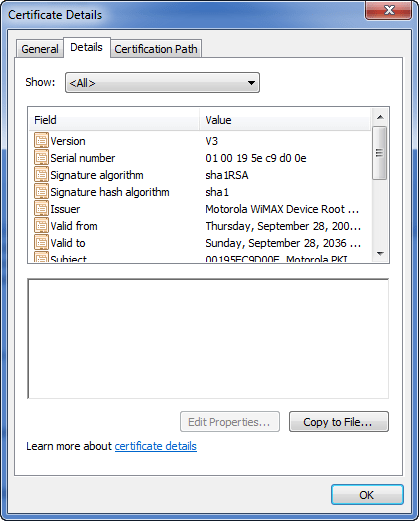
Click on the Details Tab on the top of the properties dialog window.


Certificate Details, Details Tab


Now click on the Copy to File Button.  An export process will start for the certificate.  Click on next.  On the next screen make sure No, do not export the private key is selected.  The next screen selects the DER encoded binary X.509 (.CER) option.  Verify this setting and then click next.


Certificate Export Wizard


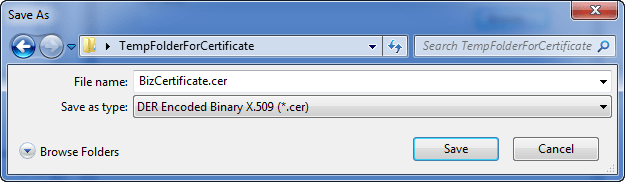
Click on next and then enter the path and filename where you want to save the certificate.


Save As File Name for Certificate


Now that you have the certificate, return to the Windows Azure Platform Web Interface (http://windows.azure.com).  Navigate to the Account Tab section of the site again.  On that page click on the Manage My API Certificates.  This is the same page as shown above in the image captioned “Windows Azure Project Account Properties“.  Once the page displays click on the Choose File button on the page.  Find the location the certificate was saved and select the certificate.  Now click the upload button to upload the file to the Windows Azure Account.


API Certificates Upload


When the file is done uploading the page will update and show something similar to what is shown in the next screenshot.


API Certificates, Finished Uploading


Now you can click on the OK button, if you haven’t already, to confirm the API Certificate in the Windows Azure MMC.  Click on the Connect button in the far right window area of the MMC.  It should take a second but the connection should occur.  You can tell by the Default storage account form drop down becomes enabled.  At this time though, since we haven’t placed anything in storage or started any storage services there will be nothing displayed in the drop down.

At this point the MMC is functional; there just isn’t much to look at in the Windows Azure Account yet.  So let’s change that and setup some sample services.  First head back over to the Windows Azure Platform Web Interface (http://windows.azure.com).  Once you’re in click on the project as we did before so that it is the focus point.  Click on the +New Service link in the top right of the main page window section.


Starting a Windows Azure Service


The next screen will display the options to create a Windows Azure Storage Account or a Hosted Services Role.  Click on the Windows Azure Storage Account option.


Windows Azure Create a Service


On the screen that renders fill out the service label and description.  Both of these fields are mostly free text, allowing spaces and special characters.  Click next when you have filled out the label and description.


Services Properties
Services Properties


The next form that comes up has the public storage account name.  This field must be compliant with URI naming conventions.  The idea also is that these storage services use a RESTful API, it is best to follow the REST Architecture ideals and name the location something easy to read and to remember.  You can click the check availability button to verify if the name is used or not.  If it is available move down and select Anywhere US for the region.


First Storage Sample


Once you are finished click the create button at the bottom of the form.  The next window will render the results of creating the Windows Azure Storage Account.  This page has all the information you’ll need to fill out the Windows Azure MMC connection information.


Windows Azure Storage Account Properties


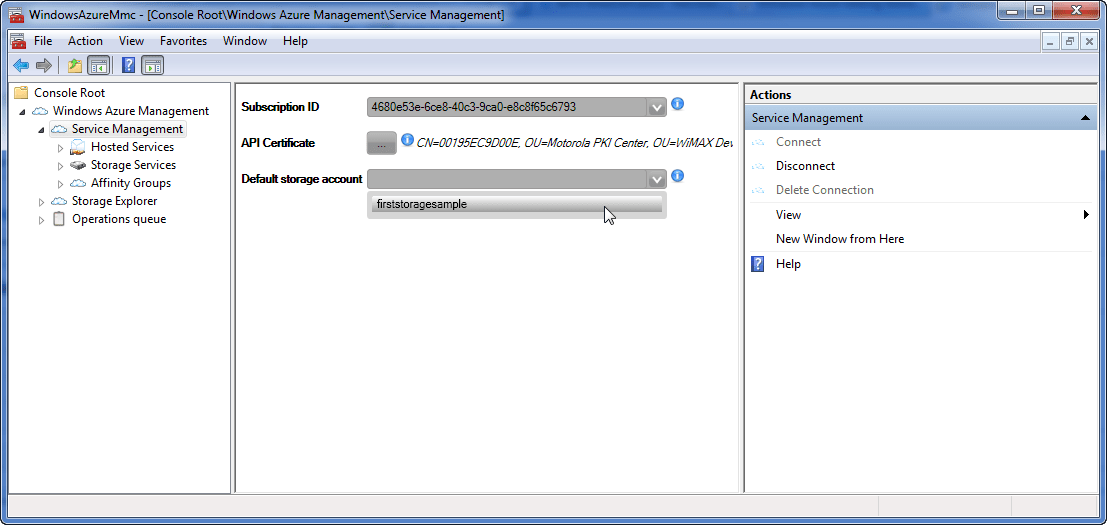
If you still have the Windows Azure MMC open, bring focus to it again.  If not open it back up and open the Windows Azure Management tree view back to the Service Management Node and verify or enter the information for the subscription ID and API Certificate.  Now click on the Connect link button on the right hand window pane.  The MMC will then connect and will populate the Default storage account drop down.  Click on the drop down and you will see your Windows Azure Storage Account that we just created.


Service Management Node Connected with Default Storage Account


Now that we have a Windows Azure Storage Account, let’s get a Windows Azure Services Role running also.  Navigate back to the Windows Azure Platform Web Interface (http://windows.azure.com).  Once the page has rendered click on your specific project, wait for that page to render and  then on the +New Service link. This time select the Windows Azure Services Role to create.  On the next page fill out the service label and description the same as with the Windows Azure Storage Account creation.


Create a Service (Role)


Click next when complete.  On the next page that renders you’ll again pick a public URI subdomain path, which I’ve used firstservicesample as mine, and select Anywhere US from the drop down for the region.  Click on the create button when complete.  The following page will display with a single cube image in the center of the screen, label Production.  For now, the instance role is available, but nothing is deployed and nothing is being charged at this time.  However this is perfect for checking out the Windows Azure MMC display of the services.


Service Role
Service Role


Return to the Windows Azure MMC and click on the Hosted Services node.  Click on Connect in the right hand window pane under actions.  The firstservicesample node, or whatever you may have named the service, will display with the staging, production, and certificates nodes appearing below.  From here you can deploy, upgrade, run, delete, suspend, swap, or even save the configuration of your roles.  This is extremely helpful so that one doesn’t always need to return to the site and can maintain multiple hosted services, storage services, affinity groups, and more from the MMC.


Windows Azure Staging


Next let’s click on the Storage Explorer Node just below the Service Management Node.  Click on New Connection and enter the Account Name as shown below.


New Account Form
New Account Form


Now that the account name and URIs are filled out.  Return to the storage services properties page in the Windows Azure Platform Web Interface (http://windows.azure.com).


Windows Azure Storage Account Properties


On this page you’ll find the key you need to finish off the form in the Windows Azure MMC.  Once you’ve completed the form click on OK.  The MMC should now populate out the cloud storage account area with a node for BLOB Containers.


Storage Account Services


Click on the BLOG Containers so and click on Add Container in the right hand side window pane under actions.  Enter a name, in this case I entered musicmanager, and click OK.  Now you should have a BLOB Storage Container in your Windows Azure Storage Account.


Windows Azure BLOB Container


Click on the musicmanager BLOB Container, or whatever you named yours, and then click on Upload BLOB under the actions window on the right hand side.  Select a file, I’ve chosen a music MP3 I have on my local machine.


Uploading a BLOG File (A Music MP3)


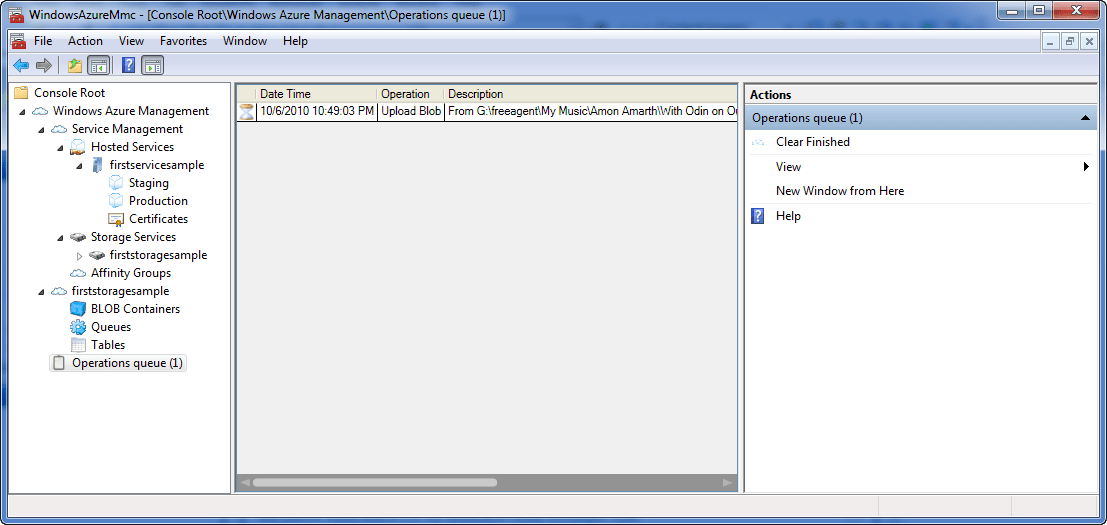
Click OK and you’ll see the Operations queue node on the lower left hand side of the Console Root tree view populate with the upload activity task.


The Upload in the Operations Queue


After the upload is complete the BLOB Container will then show the BLOBs just below it when selected in the Windows Azure MMC.