I’ve been building GraphQL APIs for a number of years now – of along side RESTful, gRPC, XML, and other API styles I won’t even bring up right now – and so far GraphQL APIs have been great to work with. The libraries in different languages form .NET’s Hot Chocolate, Go’s graphql-go, Apollo’s JavaScript based tooling and servers, to Java’s GraphQL for Spring have worked great.
Sometimes you’re in the fortunate situation where you’re using PostgreSQL or SQL Server, or other supported database for a tool like Hasura. Being able to get a full GraphQL (with REST options too) API running in seconds is pretty impressive. From a development perspective it is a massive boost. As Hasura adds more database connectors as they have with Snowflake and Amazon Athena, the server and tooling becomes even more powerful.
With that I wanted to show a N+1 demo where N is day 1 with Hasura. The idea is what do you do immediately after you get a sample service running with Hasura. How do you integrate it with other services, or more specifically how do you integrate your Hasura API along side APIs you’ve written yourself, such as an enterprise GraphQL for Spring based API running against Mongo or other data source? This repo is the basis for several demonstration repositories I am building that will show how you can setup – generally for local development – Hasura + X API with Y Language stack.
This is the Hasura quick start repository here, with migrations and metadata for a local setup. The first demonstration repo for a peripheral GraphQL API will be a Spring based API in this repository. The following steps will get the quick start repository up and running.
- Clone this repo
git clone git@github.com:Adron/hasura-quick-start.git. - From the root (where the docker-compose.yml file is located) execute
docker compose up -d. - Navigate into the
hasuradirectory. - Execute
hasura metadata apply, thenhasura migrate apply, and thenhasura metadata apply. Just do it, it’s a strange workflow thing. - Navigate now into the `hasura` directory and execute
hasura console.
These steps are demonstrated in this video from 48 seconds.
What do you get once deployed?
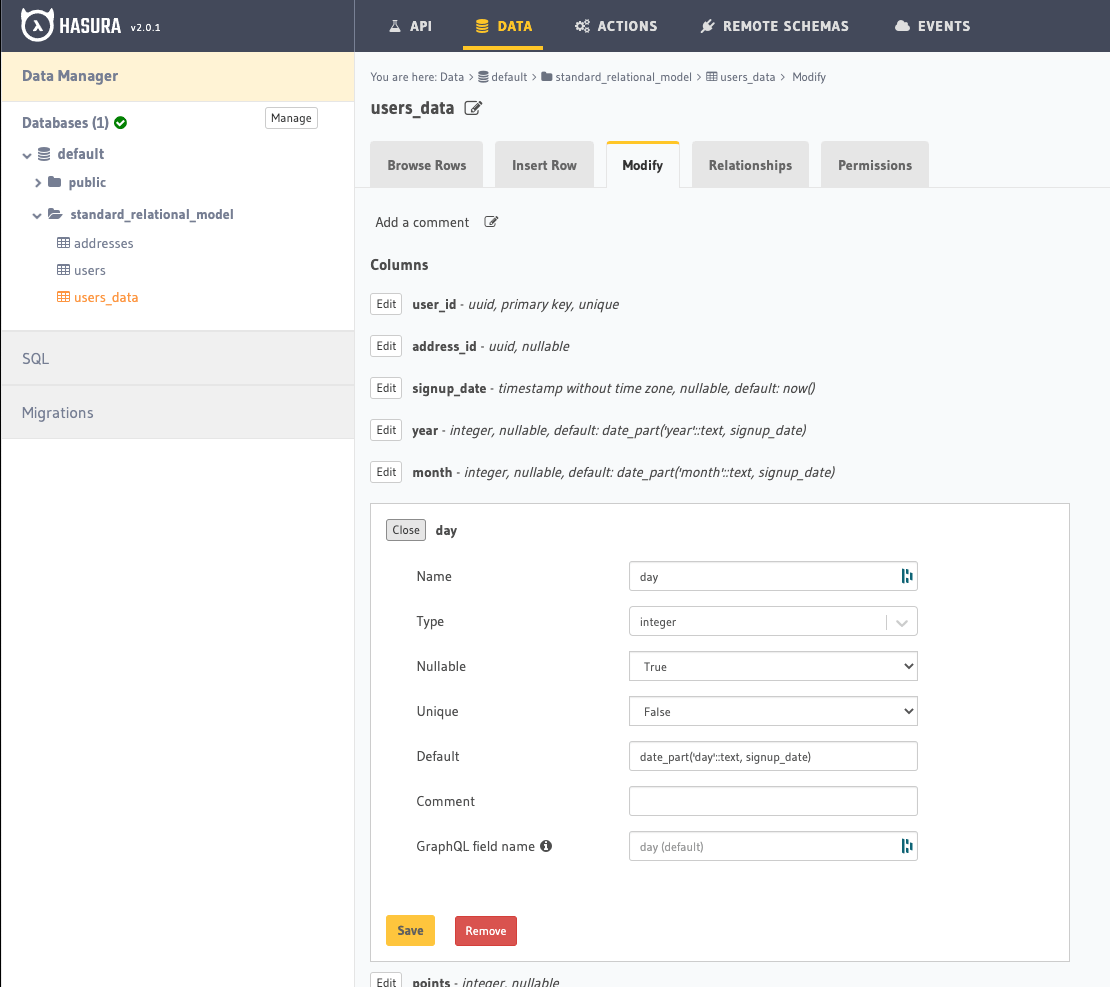
The following are some of the core capabilities of Hasura and showcase what you can get up and running in a matter of seconds, even when you start from a completely empty database! First off you’ll find the database now has 3 tables along with their pertinent schema built out in PostgreSQL and available via Hasura, as shown here under the Data tab of the console.

I also created a schema diagram just to provide a visual of how these tables are designed.

For the remote schema, the Spring API, the following steps will get it cloned and running locally.
- Clone this repo
git clone git@github.com:Adron/hasura-spring-boot-graphql.git. - Execute
./gradlew buildto get the jar file build. It will then be located in the build/libs directory of the project. - Next build the docker image with
docker build -t adron/hasura-spring-boot-graphql .to build the docker image locally. - Now you can either start this container with
docker compose up -dusing the docker-compose.yml in the project or you can run the image with Docker specifically withdocker run -p 8081:8080 adron/hasura-spring-boot-graphql.
For a walkthrough of getting the Spring API running, check out 2:28 onward in this video.
Now both of these instances are running locally and you can test each out respectively, but not specifically together. I’ll have probably write up another post on how to get services that spin up separately to run together for localized development. However, with the way things are setup in the two repos, it’s as if one team is the Hasura team building a GraphQL API and another is a Spring Java GraphQL API team, and they’re working autonomously of each other just based on contract of the APIs themselves.
Remote Schema
With that being the scenario, I’ve deployed the Spring API out remotely so that I could show how to put together a remote schema connection and then a remote join query, i.e. nested query in GraphQL speak, across these two APIs.
To add the remote schema, click on the remote schemas tab on the console. Add a name (1), then the URI (2), and optionally if needed add appropriate headers (3) or forward all headers from client requests.

Once that’s added, navigate to the relationships tab of the new remote schema and click on add. Then for this example, select remote database (1), then add a name (4) (Customer in the example) and then for type choose object (3) (per the example).

Then scroll down on that console screen and choose sales_data (1) and default, public, and users (2) under the reference database, schema, and table. Next up choose the source field (3) and reference column (4).

Once added it will look like this in the console.

This creates a relationship to be able to make nested queries against these sources with GraphQL. If it were a single contiguous database the schema would look like this. I’ve color coded the sales_data table as red, to signify it is the table we know is in another database (or, specifically, provided via another hosted API). However, as stated, in a single database the relationships would now look like this. The relationship however, isn’t in a database, but stored in the Hasura metadata between users and sales_data.

Now writing a query across this data would shape up like this. Because of the way the relationship was drawn via the remote schema, the path to get the nested object Customer (2) for the sales data is to start with the sales_data (1) entity. As shown.
sales_data {
  sales_number
  updated_at
  Customer {
    name
  }
}
Now we want to add more details about the particular customer like their email and details. To do this we’ll utilize another nesting level within this query that delves into relationships that are in the PostgreSQL database itself.
sales_data {
  sales_number
  updated_at
  Customer {
    name
    emails {
      email
    }
    details {
      details
    }
  }
}
With this the nested details email (3) and details (4) will be provided, which is foreign key relationships to the primary key table users in the underlying database, made available by Hasura’s relationships in metadata.

Boom! That’s it. Pretty easy setup if the databases and APIs have Hasura available to connect them in this way. Otherwise, this is a huge challenge to develop against if you’re just using solely a tech stack like Apollo, Spring Boot, or Hot Chocolate. Often something along federation and more complexities would come into play. But more on that later, I’ve got a piece coming on federation, stitching, remote schemas, and gateway – among various ways – to get multiple GraphQL, or GraphQL and RESTful APIs together into a singular, or singularly managed, API end point.
Hope that was useful, if you’ve got comments, questions, or curiosities let me know in the comments here, or pop over to the video and leave a comment there.


You must be logged in to post a comment.