Terraform Changes, Provisioners, Connections, and Static Nodes

NOTE: Video toward the bottom of the post with the timeline so you can navigate into certain points of the video where I speak to different topics.

Cluster Nodes Currently

First I start out this session with a simple issue I ran into the previous night. The fact that a variable in the name of the instance resource being created causes the instance to be destroyed and created on every single execution of terraform. That won’t do so I needed to just declare each node, at least the first three, maybe five (cuz’ it’s best to go with 2n+1 instances in most distributed systems). So I removed the module I created in the last session and created two nodes to work with, for creation and setup of the provisioners that I’d use to setup Cassandra.

In addition to making each of the initial nodes statically declared, I also, at least for now added public IP’s for troubleshooting purposes. Once those are setup I’ll likely remove those and ensure that the cluster just communicates on the private IP’s, or at least disallow traffic from hitting the individual nodes of the cluster even via the public IP’s via the firewall settings.

The nodes, public and private IP addresses, now look like this.

[sourcecode language=”bash”]
resource “google_compute_address” “node_zero_address” {
name = “node-0-address”
subnetwork = “${module.network_development.subnetwork_west}”
address_type = “INTERNAL”
address = “10.1.0.2”
}

resource “google_compute_address” “node_zero_public_address” {
name = “node-0-public”
}

resource “google_compute_instance” “node_zero” {
name = “node-0”
machine_type = “n1-standard-1”
zone = “us-west1-a”

boot_disk {
initialize_params {
image = “ubuntu-minimal-1804-bionic-v20180814”
}
}

network_interface {
subnetwork = “${module.network_development.subnetwork_west}”
address = “${google_compute_address.node_zero_address.address}”

access_config {
nat_ip = “${google_compute_address.node_zero_public_address.address}”
}
}

service_account {
scopes = [
“userinfo-email”,
“compute-ro”,
“storage-ro”,
]
}
}
[/sourcecode]

Provisioners

When using Terraform provisioners there are a few things to take into account. First, which is kind of obvious but none the less I’m going to mention it, is to know which user, ssh keys, and related authentication details you’re using to actually login to the instances you create. It can get a little confusing sometimes, at least it’s gotten me more than once, when gcloud initiates making ssh keys for me while I’ve got my own keys already created. Then when I setup a provisioner I routinely forget that I don’t want to use the id_rsa but instead the google created keys. I talk more about this in the video, with more ideas about insuring also that the user on the machine is the right user, it’s setup for centos or ubuntu or whatever distro your using, and all of these specifics.

Once that’s all figured out, sorted, and not confused, it’s just a few steps to get a provisioner setup and working. The first thing is we need to setup whichever provisioner it is we want to use. There are several options; file, local-exec, remote-exec, and some others for chef, salt-masterless, null_resource, and habitat. Here I’m just going to cover file, local-exec, and remote-exec. First let’s take a look at the file provisioner.

[sourcecode language=”bash”]
resource “google_compute_instance” “someserver” {
# … some other fields for the particular instance being created.

# Copies the myapp.conf file to /etc/myapp.conf
provisioner “file” {
source = “directory/relative/to/repo/path/thefile.json”
destination = “/the/path/that/will/be/created/andthefile.json”
}
}
[/sourcecode]

This example of a provisioner shows, especially with my fancy naming, several key things;

The provisioner goes into an instance resource, as a field within the instance resource itself.
The provisioner, which I’ve selected the “file” type of provisioner here, then has several key fields within the field, for the file provisioner those two required fields are source and destination.
The source takes the file to be copied to the instance, which is locally in this repository, or I suppose could be outside of it, based on a general path and the file name. You could just put the filename if it’s just there in the root of where this is being executed.
The destination is where within the instance users folder is on the remote server. So if I set a folder/filename.json it’ll create a folder called “folder” and put the file in it, possibly renamed if it isn’t the same name, here as filename.json.

But of course, one can’t just simply copy a file to a remote instance without a user and the respective authentication, which is where the connection resource comes into play within the provisioner resource. That makes the provisioner look like this.

[sourcecode language=”bash”]
resource “google_compute_instance” “someserver” {
# … some other fields for the particular instance being created.

# Copies the myapp.conf file to /etc/myapp.conf
provisioner “file” {
source = “directory/relative/to/repo/path/thefile.json”
destination = “/the/path/that/will/be/created/andthefile.json”
connection {
type = “ssh”
user = “useraccount”
private_key = “${file(“~/.ssh/id_rsa”)}”
agent = false
timeout = “30s”
}
}
}
[/sourcecode]

Here the connection resource adds several new fields that are used to make the connection. This is the same for the file or remote-exec provisioner. As mentioned earlier, and through troubleshooting in the video, in this case I’ve just put in the syntax id_rsa since that’s the common ssh private key. However with GCP I needed to be using the google_compute_engine ssh private key.

The other fields are pretty self-explanatory, but let’s discuss real quick. The type, is simply that it is an ssh connection that will be used. One can also use plain text and some other options, or in the case of windows one uses the winrm connection type.

The user field is simply the name of the user which will be used to authenticate to the remote instance upon creation. The private key is the private ssh key of the user that needs to connect to that particular instance and do whatever the provisioner is going to do.

The agent, if set to false, doesn’t use ssh-agent, but if set to true does. On windows the only supported ssh authentication is pageant.

Then the timeout field is the time, in seconds as shown, that the provisioner will wait for execution to respond before an error is thrown in the terraform execution.

After all of those things were setup I created a simple script to install Cassandra which I called install-c.sh.

[sourcecode language=”bash”]
#!/usr/bin/env bash

# Installing Cassandra 3.11.3

echo “deb http://www.apache.org/dist/cassandra/debian 311x main” | sudo tee -a /etc/apt/sources.list.d/cassandra.sources.list
curl https://www.apache.org/dist/cassandra/KEYS | sudo apt-key add –
sudo apt-get update
sudo apt-key adv –keyserver pool.sks-keyservers.net –recv-key A278B781FE4B2BDA
sudo apt-get install -Y cassandra
[/sourcecode]

Now with the script done I can use the file provisioner to move it over to the server. Which I did in the video, and then started putting together the remote-exec provisioner. However I messed around with the local-exec provisioner too but then realized I’d gotten them turned around in my head. The local-exec actually initiates a script executing here on the local machine that terraform execution starts from, which I needed terraform to execute the script that is out on the remote instance that was just created. That provisioner looks like this.

[sourcecode language=”bash”]
provisioner “remote-exec” {
inline = [
“chmod +x install-c.sh”,
“install-c.sh”,
]

connection {
type = “ssh”
user = “adron”
private_key = “${file(“~/.ssh/google_compute_engine”)}”
agent = false
timeout = “30s”
}
}
[/sourcecode]

In this provisioner the inline field takes an array of strings which will be executed on the remote server. I could have just entered the installation steps for installing cassandra here, but considering I’ll actually want to take additional steps and actions, that would make the privisioner exceedingly messy. So what I do here is setup the connection and then for the inline field I modify the file so that it can be executed and then execute the script on the server. It then goes through the steps of adding the apt-get repo, taking respective verification steps, running and update, and then installing cassandra.

After that I wrap up for this session. Static instances created, provisioners dedicated, and connections made and verified for the provisioners with cassandra being installed. So for the next session I’m all set to start connecting the nodes together into a cluster and taking whatever next steps I need.

  • 0:57 Thrashing Code Intro
  • 3:43 Episode Intro, stepping into Terraform for the session.
  • 4:25 Starting to take notes during session!
  • 6:12 Describing the situation where variables in key values of resources causes the resources to recreate every `terraform apply` so I broke out each individual node.
  • 9:36 I start working with the provisioner to get a script file on machine and also execute that script file. It’s tricky, because one has to figure out what the user for the particular image is. Also some oddball mess with my mic starts. Troubleshooting this, but if you know what’s up with OBS streaming software and why this is happening, lemme know I’m all ears! 🙂
  • 31:25 Upon getting the file provisioner to finally work, setting extra fields for time out and such, I moved on to take next steps with IntelliJ cuz the IDE is kind of awesome. In addition, the plugins for HCL (HashiCorp Configuration Language) and related elements including features built into the actual IDE provide some extra autocomplete and such for Terraform work. At this time I go through actually setting up the IDE (installed it earlier while using Visual Studio Code).
  • 34:15 Setup of IntelliJ plugins specific to Terraform and the work at hand.
  • 35:50 I show some of the additional fields that the autocomplete in Terraform actually show, which helps a lot during troubleshooting or just building out various resources.
  • 37:05 Checking out the Apache Cassandra (http://cassandra.apache.org/) download and install commands and adding those to the install script for the Terraform provisioner file copy to copy over to the instance.
  • 43:18 I add some configurations for terraform builds/execution via IntelliJ. There are terraform specific build options and also bash file execution options which I cover in video.
  • 45:32 I take a look at IntelliJ settings to determine where to designate the Terraform executable file. This is important for getting the other terraform build configuration options to work.
  • 48:00 Start of debugging and final steps between now and…
  • 1:07:16 …finish of successful Cassandra install on nodes using provisioners.
  • 1:07:18 Finishing up by committing the latest changes to repository.
  • 1:09:04 Hacker outtro!

Resources:


The Conversations and Samples of Multi-Cloud

Over the last few weeks the I’ve been putting together multi-cloud conversations and material related to multi-cloud implementation, conversations, and operational situations that exist today. I took a quick look at some of my repos on Github and realized I’d put together a multi-cloud Node.js sample app some time ago and should update it. I’ll get to that, hopefully, but I also stumbled into some tweets and other material I wanted to collect a few of them together.

Some Demo Code for Multi-Cloud

Conversations on Multi-cloud

  • Mitchell Hashimoto of HashiCorp posted a well written comment/article on what he’s been seeing (for some time) on Reddit.
  • A well worded tweet… lot’s of talk per Google’s somewhat underlying push for GKE on prem. Which means more clouds, more zones, and more multi-cloud options.

  • Distributed Data Show Conversations


Leave a comment, tweet at me (@adron), let me know your thoughts or what you’re working on re: multi-cloud. I’m curious to learn about and know more war stories.

Build a Kubernetes Cluster on Google Cloud Platform with Terraform

terraformIn this blog entry I’m going to detail the exact configuration and cover in some additional details the collateral resources you can expect to find once the configuration is executed against with Terraform. For the repository to this write up, I create our_new_world available on Github.

First things first, locally you’ll want to have the respective CLI tools installed for Google Cloud Platform, Terraform, and Kubernetes.

Now that all the prerequisites are covered, let’s dive into the specifics of setup.

gcp
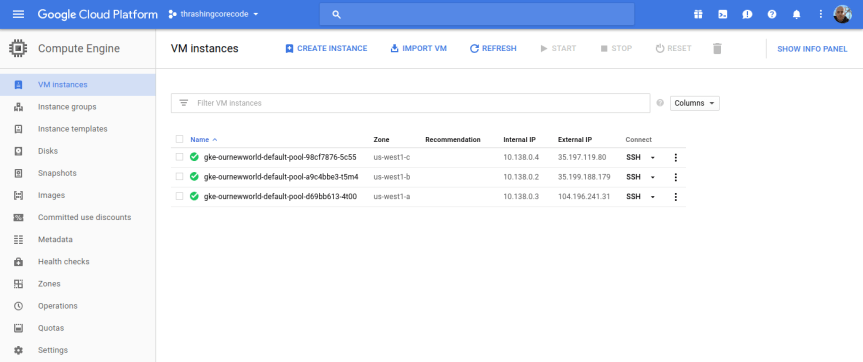
If you take a look at the Google Cloud Platform Console, it’s easy to get a before and after view of what is and will be built in the environment. The specific areas where infrastructure will be built out for Kubernetes are in the following areas, which I’ve taken a few screenshots of just to show what the empty console looks like. Again, it’s helpful to see a before and after view, it helps to understand all the pieces that are being put into place.

The first view is of the Google Compute Engine page, which currently on this account in this organization I have no instances running.

gcp-01

This view shows the container engines running. Basically this screen will show any Kubernetes clusters running, Google just opted for the super generic Google Container Engine as a title with Kubernetes nowhere to be seen. Yet.

gcp-02

Here I have one ephemeral IP address, which honestly will disappear in a moment once I delete that forwarding rule.

gcp-03

These four firewall rules are the default. The account starts out with these, and there isn’t any specific reason to change them at this point. We’ll see a number of additional firewall settings in a moment.

gcp-04

Load balancers, again, currently empty but we’ll see resources here shortly.

gcp-05

Alright, that’s basically an audit of the screens where we’ll see the meat of resources built. It’s time to get the configurations built now.

Time to Terraform Our New World

Using Terraform to build a Kubernetes cluster is pretty minimalistic. First, as I always do I add a few files the way I like to organize my Terraform configuration project. These files include:

  • .gitignore – for the requisite things I won’t want to go into the repository.
  • connections.tf – for the connection to GCP.
  • kubernetes.tf – for the configuration defining the characteristics of the Kubernetes cluster I’m working toward getting built.
  • README.md – cuz docs first. No seriously, I don’t jest, write the damned docs!
  • terraform.tfvars – for assigning variables created in variables.tf.
  • variables.tf – for declaring and adding doc/descriptions for the variables I use.

In the .gitignore I add just a few items. Some are specific to my setup that I have and IntelliJ. The contents of the file looks like this. I’ve included comments in my .gitignore so that one can easily make sense of what I’m ignoring.

# A silly MacOS/OS-X hidden file that is the bane of all repos.
.DS_Store

# .idea is the user setting configuration directory for IntelliJ, or more generally Jetbrains IDE Products.
.idea
.terraform

The next file I write up is the connections.tf file.

provider "google" {
  credentials = "${file("../secrets/account.json")}"
  project     = "thrashingcorecode"
  region      = "us-west1"
}

The path ../secrets/account.json is where I place my account.json file with keys and such, to keep it out of the repository.

The project in GCP is called thrashingcorecode, which whatever you’ve named yours you can always find right up toward the top of the GCP Console.

console-bar

Then the region is set to us-west1 which is the data centers that are located, most reasonably to my current geographic area, in The Dalles, Oregon. These data centers also tend to have a lot of the latest and greatest hardware, so they provide a little bit more oompf!

The next file I setup is the README.md, which you can just check out in the repository here.

Now I setup the variables.tf and the terraform.tfvars files. The variables.tf includes the following input and output variables declared.

// General Variables

variable "linux_admin_username" {
  type        = "string"
  description = "User name for authentication to the Kubernetes linux agent virtual machines in the cluster."
}

variable "linux_admin_password" {
  type ="string"
  description = "The password for the Linux admin account."
}

// GCP Variables
variable "gcp_cluster_count" {
  type = "string"
  description = "Count of cluster instances to start."
}

variable "cluster_name" {
  type = "string"
  description = "Cluster name for the GCP Cluster."
}

// GCP Outputs
output "gcp_cluster_endpoint" {
  value = "${google_container_cluster.gcp_kubernetes.endpoint}"
}

output "gcp_ssh_command" {
  value = "ssh ${var.linux_admin_username}@${google_container_cluster.gcp_kubernetes.endpoint}"
}

output "gcp_cluster_name" {
  value = "${google_container_cluster.gcp_kubernetes.name}"
}

In the terraform.tfvars file I have the following assigned. Obviously you wouldn’t want to keep your production Linux username and passwords in this file, but for this example I’ve set them up here as the repository sample code can only be run against your own GCP org service, so remember, if you run this you’ve got public facing default linux account credentials exposed right here!

cluster_name = "ournewworld"
gcp_cluster_count = 1
linux_admin_username = "frankie"
linux_admin_password = "supersecretpassword"

Now for the meat of this effort. The kubernetes.tf file. The way I’ve set this file up is as shown.

resource "google_container_cluster" "gcp_kubernetes" {
  name               = "${var.cluster_name}"
  zone               = "us-west1-a"
  initial_node_count = "${var.gcp_cluster_count}"

  additional_zones = [
    "us-west1-b",
    "us-west1-c",
  ]

  master_auth {
    username = "${var.linux_admin_username}"
    password = "${var.linux_admin_password}}"
  }

  node_config {
    oauth_scopes = [
      "https://www.googleapis.com/auth/compute",
      "https://www.googleapis.com/auth/devstorage.read_only",
      "https://www.googleapis.com/auth/logging.write",
      "https://www.googleapis.com/auth/monitoring",
    ]

    labels {
      this-is-for = "dev-cluster"
    }

    tags = ["dev", "work"]
  }
}

With all that setup I can now run the three commands to get everything built. The first command is terraform init. This is new with the latest releases of Terraform, which pulls down any of the respective providers that a Terraform execution will need. In this particular project it pulls down the GCP Provider. This command only needs to be run the first time before terraform plan or terraform apply are run, if you’ve deleted your .terraform directory, or if you’ve added configuration for something like Azure, Amazon Web Services, or Github that needs a new provider.

terraform-init

Now to ensure and determine what will be built, I’ll run terraform plan.

terraform-plan

Since everything looks good, time to execute with terraform apply. This will display output similar to the terraform plan command but for creating the command, and then you’ll see the countdown begin as it waits for instances to start up and networking to be configured and routed.

terraform-apply

While waiting for this to build you can also click back and forth and watch firewall rules, networking, external IP addresses, and instances start to appears in the Google Cloud Platform Console. When it completes, we can see the results, which I’ll step through here with some added notes about what is or isn’t happening and then wrap up with a destruction of the Kubernetes cluster. Keep reading until the end, because there are some important caveats about things that might or might not be destroyed during clean up. It’s important to ensure you’ve got a plan to review the cluster after it is destroyed to make sure resources and the respective costs aren’t still there.

Compute Engine View

In the console click on the compute engine option.

gcp-console-compute-engine

I’ll start with the Compute Engine view. I can see the individual virtual machine instances here and their respective zones.

gcp-console-01

Looking at the Terraform file confiugration I can see that the initial zone to create the cluster in was used, which is us-west1-a inside the us-west1 region. The next two instances are in the respective additional_zones that I marked up in the Terraform configuration.

additional_zones = [
  "us-west1-b",
  "us-west1-c",
]

You could even add additional zones here too. Terraform during creation will create an additional virtual machine instance to add to the Kubernetes cluster for each increment that initial_node_count is set to. Currently I set mine to a variable so I could set it and other things in my terraform.tfvars file. Right now I have it set to 1 so that one virtual machine instance will be created in the initial zone and in each of the designated additional_zones.

Beyond the VM instances view click on the Instance groups, Instance templates, and Disks to seem more items setup for each of the instances in the respective deployed zones.

If I bump my virtual machine instance count up to 2, I get 6 virtual machine instances. I did this, and took a screenshot of those instances running. You can see that there are two instances in each zone now.

gcp-console-2instances-01

Instance groups

Note that an instance group is setup for each zone, so this group kind of organizes all the instances in that zone.

gcp-console-02

Instance Templates

Like the instance groups, there is one template per zone. If I setup 1 virtual machine instance or 10 in the zone, I’ll have one template that describes the instances that are created.

gcp-console-03

gcp-console-04

To SSH into any of these virtual machine instances, the easiest way is to navigate into one of the views for the instances, such as under the VM instances section, and click on the SSH button for the instance.

gcp-console-05

Then a screen will pop up showing the session starting. This will take 10-20 seconds sometimes so don’t assume it’s broken. Then a browser based standard looking SSH terminal will be running against the instance.

ssh-window-01

ssh-window-02

This comes in handy if any of the instances ends up having issues down the line. Of all the providers GCP has made connecting to instances and such with this and tools like gcloud extremely easy and quick.

Container Engine View

In this view we have cluster specific information to check out.

gcp-console-container-clusters

Once the cluster view comes up there sits the single cluster that is built. If there are additional, they display here just like instances or other resources on other screens. It’s all pretty standard and well laid out in Google Cloud Platform fashion.

gcp-console-05

The first thing to note, in my not so humble opinion, is the Connect button. This, like on so many other areas of the console, has immediate, quick, easy ways to connect to the cluster.

gcp-console-06

Gaining access to the cluster that is now created with the commands available is quick. The little button in the top right hand corner copies the command to the copy paste buffer. The two commands execute as shown.

gcloud container clusters get-credentials ournewworld --zone us-west1-a --project thrashingcorecode

and then

kubectl proxy

gcp-console-07

With the URI posted after execution of kubectl proxy I can check out the active dashboard rendered for the container cluster at 127.0.0.1:8001/ui.

IMPORTANT NOTE: If the kubectl version isn’t up to an appropriate parity version with the server then it may not render this page ok. To ensure that the version is at parity, run a kubectl version to see what versions are in place. I recently went through troubleshooting this scenario which rendered a blank page. After trial and error it came down to version differences on server and client kubectl.

Kubernetes_Dashboard

I’ll dive into more of the dashboard and related things in a later post. For now I’m going to keep moving forward and focus on the remaining resources built, in networking.

VPC Network

gcp-console-09

Once the networking view renders there are several key tabs on the left hand side; External IP addresses, Firewall rules, and Routes.

External IP Addresses

Setting and using external IP addresses allow for routing to the various Kubernetes nodes. Several ephemeral IP addresses are created and displayed in this section for each of the Kubernetes nodes. For more information check out the documentation on reserving a static external IP address and reserving an internal IP address.

gcp-console-11

Firewall Rules

In this section there are several new rules added for the cluster. For more information specific to GCP firewall rules check out the documentation about firewall rules.

gcp-console-12

Routes

Routes are used to setup paths mapping an IP range to a destination. Routes setup a VPC Networks where to send packets for a particular IP address. For more information about documentation route details.

gcp-console-13

Each of these sections have new resources built and added as shown above. More than a few convention based assumptions are made with Terraform.

Next steps…

In my next post I’ll dive into some things to setup once you’ve got your Kubernetes cluster. Setting up users, getting a continuous integration and delivery build started, and more. I’ll also be writing up another entry, similar to this for AWS and Azure Cloud Providers. If you’d like to see Kubernetes setup and a tour of the setup with Terraform beyond the big three, let me know and I’ll add that to the queue. Once we get past that there are a number of additional Kubernetes, containers, and dev specific posts that I’ll have coming up. Stay tuned, subscribe to the blog feed or follow @ThrashingCode for new blog posts.

Resources: