Alright, nothing like multi-OS environments so you can prepare for the maximum number of issues that might come up. My recent issue is re-opening some virtual machines, originally created on Windows 10, and now with intent to use them on Linux. When trying to open these existing virtual machines I’ve gotten the following error:
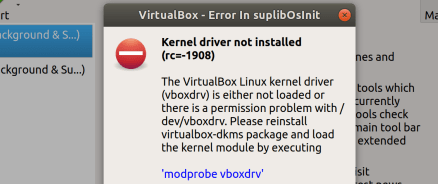
Kernel driver not installed (rc=-1908)
The VirtualBox Linux kernel driver (vboxdrv) is either not loaded or there is a permission problem with /dev/vboxdrv. Please reinstall the kernel module by executing
‘modprobe vboxdrv’
as root.
where: sublibOsInit what: 3 VERR_VM_DRIVER_NOT_INSTALLED (-1908) – The support driver is not installed. On linux, open returned ENOENT.

Upon researching I found this could occur on multiple operating systems really, and have included the fixes for the various platforms. First however, let’s talk about the Linux fix.
Linux
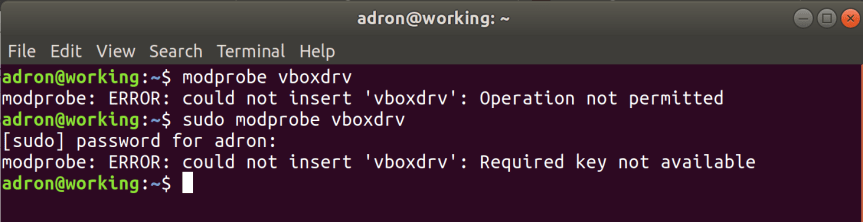
For this particular situation I tried the command given in the dialog modprobe vboxdrv to see if that would fix it. But no go. I got some additional errors that seemed nonsensical.
At this point I dug into the search engine. The first post I found seemed to make sense. I tried the commands.
[sourcecode language=”bash”]
sudo apt-get install build-essential module-assistant
sudo m-a prepare
[/sourcecode]

That went well, so on to the next step of building the virtualbox kernel driver.
[sourcecode language=”bash”]
sudo /etc/init.d/vboxdrv setup
[/sourcecode]
That gave me “sudo: /etc/init.d/vboxdrv: command not found“. So I did a find for the file.
[sourcecode language=”bash”]
sudo find / -name “vboxdrv”
[/sourcecode]
The results pointed out that my install of Virtual Box, done via the Ubuntu App Store, was version 5.2.8. This is clearly not going to work out well because the latest version is 6.0.4 right now. Next I uninstalled this old version via the Ubuntu App Store Application.

Next I navigated back out the Virtual Box Download page. There I downloaded the latest version and installed it via the downloadable Ubuntu *.deb file.
This installs Virtual Box through the Ubuntu App Store application but sets up the more up to date repository to get the installation from.

Ok, so all this at this point I ran VirtualBox after the installation, it installed according to the standard directories this time but still didn’t work. What the hell, I’ve no idea. I did another search and found Øyvind Stegard’s blog entry on fixing the “VirtualBox + Secure Boot = Fail“. He states at the start of the blog entry,
“The problem is the requirement that all kernel modules must be signed by a key trusted by the UEFI system, otherwise loading will fail. Ubuntu does not sign the third party vbox* kernel modules, but rather gives the user the option to disable Secure Boot upon installation of the virtualbox package.”
Stegard then adds two very important links with pertinent information about this issue, I’ve reposted here too:
- http://gorka.eguileor.com/vbox-vmware-in-secureboot-linux-2016-update/
- http://askubuntu.com/questions/760671/could-not-load-vboxdrv-after-upgrade-to-ubuntu-16-04-and-i-want-to-keep-secur
After going through Øyvind‘s steps, I finally got the previously specified command from above.
[sourcecode language=”bash”]
sudo /etc/init.d/vboxdrv setup
[/sourcecode]
Now VirtualBox started up just fine. Finally. Ugh! But hey, in the process I now understand a little bit more about secure boot, current BIOS’s, and related hardware concerns. Not that I had set out or wanted to deal with this right now, but boom, it’s done!
Alright, but if you fall into this with MacOS, it’s a slightly different story. Here’s some fixes around that.
MacOS
Ok, I started writing up and searching as I wrote, and instead of continuing to write it looks like this blog entry popped up with the exact error I’d gotten in the past (the reason I wanted to included MacOS for future ref). If you’ve gotten this error, check out Xilin Sun‘s post Solving VirtualBox “Solving VirtualBox “kernel driver not installed (rc=-1908)” Error on macOS“.


You must be logged in to post a comment.