
Enhanced session mode provides significantly higher performance, hardware utilization, and things like copy & paste between the host and the VM. To make the best use of the VM as a work station this feature is a must have. However, an Ubuntu (or other) installation doesn’t have this capability provided by default, additional software and steps are required to get it working. Those steps are what follows.
Continue reading “Ubuntu on Hyper-V, Insuring Enhanced Session Works”Tag: linux
Virtual Box Issue “Kernel driver not installed (rc=-1908)”
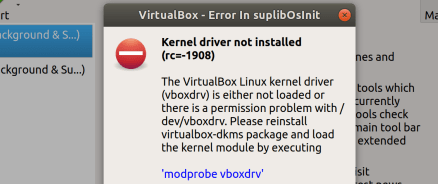
Alright, nothing like multi-OS environments so you can prepare for the maximum number of issues that might come up. My recent issue is re-opening some virtual machines, originally created on Windows 10, and now with intent to use them on Linux. When trying to open these existing virtual machines I’ve gotten the following error:
Kernel driver not installed (rc=-1908)
The VirtualBox Linux kernel driver (vboxdrv) is either not loaded or there is a permission problem with /dev/vboxdrv. Please reinstall the kernel module by executing
‘modprobe vboxdrv’
as root.
where: sublibOsInit what: 3 VERR_VM_DRIVER_NOT_INSTALLED (-1908) – The support driver is not installed. On linux, open returned ENOENT.

Upon researching I found this could occur on multiple operating systems really, and have included the fixes for the various platforms. First however, let’s talk about the Linux fix.
Linux
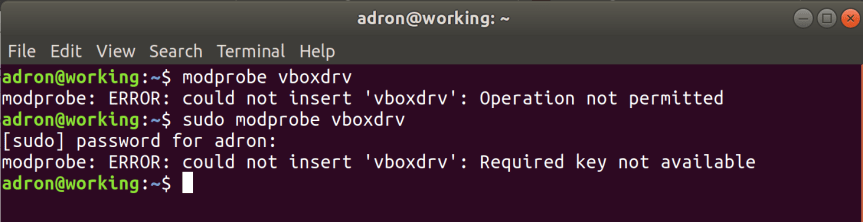
For this particular situation I tried the command given in the dialog modprobe vboxdrv to see if that would fix it. But no go. I got some additional errors that seemed nonsensical.
At this point I dug into the search engine. The first post I found seemed to make sense. I tried the commands.
[sourcecode language=”bash”]
sudo apt-get install build-essential module-assistant
sudo m-a prepare
[/sourcecode]

That went well, so on to the next step of building the virtualbox kernel driver.
[sourcecode language=”bash”]
sudo /etc/init.d/vboxdrv setup
[/sourcecode]
That gave me “sudo: /etc/init.d/vboxdrv: command not found“. So I did a find for the file.
[sourcecode language=”bash”]
sudo find / -name “vboxdrv”
[/sourcecode]
The results pointed out that my install of Virtual Box, done via the Ubuntu App Store, was version 5.2.8. This is clearly not going to work out well because the latest version is 6.0.4 right now. Next I uninstalled this old version via the Ubuntu App Store Application.

Next I navigated back out the Virtual Box Download page. There I downloaded the latest version and installed it via the downloadable Ubuntu *.deb file.
This installs Virtual Box through the Ubuntu App Store application but sets up the more up to date repository to get the installation from.

Ok, so all this at this point I ran VirtualBox after the installation, it installed according to the standard directories this time but still didn’t work. What the hell, I’ve no idea. I did another search and found Øyvind Stegard’s blog entry on fixing the “VirtualBox + Secure Boot = Fail“. He states at the start of the blog entry,
“The problem is the requirement that all kernel modules must be signed by a key trusted by the UEFI system, otherwise loading will fail. Ubuntu does not sign the third party vbox* kernel modules, but rather gives the user the option to disable Secure Boot upon installation of the virtualbox package.”
Stegard then adds two very important links with pertinent information about this issue, I’ve reposted here too:
- http://gorka.eguileor.com/vbox-vmware-in-secureboot-linux-2016-update/
- http://askubuntu.com/questions/760671/could-not-load-vboxdrv-after-upgrade-to-ubuntu-16-04-and-i-want-to-keep-secur
After going through Øyvind‘s steps, I finally got the previously specified command from above.
[sourcecode language=”bash”]
sudo /etc/init.d/vboxdrv setup
[/sourcecode]
Now VirtualBox started up just fine. Finally. Ugh! But hey, in the process I now understand a little bit more about secure boot, current BIOS’s, and related hardware concerns. Not that I had set out or wanted to deal with this right now, but boom, it’s done!
Alright, but if you fall into this with MacOS, it’s a slightly different story. Here’s some fixes around that.
MacOS
Ok, I started writing up and searching as I wrote, and instead of continuing to write it looks like this blog entry popped up with the exact error I’d gotten in the past (the reason I wanted to included MacOS for future ref). If you’ve gotten this error, check out Xilin Sun‘s post Solving VirtualBox “Solving VirtualBox “kernel driver not installed (rc=-1908)” Error on macOS“.
Fixing Windows 10 Drives for Linux Mounting
I mentioned, since I’d run into this problem, a while back in my post “Oh, exFAT Doesn’t Work on Linux” which then includes a fix. Here’s a slightly more updated fix for the same and another fix for mounting just the Windows 10 partition if you have a Windows 10 System Drive (i.e. the drive with the OS on it). First, the exFAT install can simply be done with the following, no need to go get it with git via a clone.
[sourcecode language=”bash”]
sudo apt-get install exfat-fuse exfat-utils
[/sourcecode]
The other trick is to get a Windows 10 System Drive mounted. To do that, open up the disks application and click the gears on the drive. Then make the following settings by clicking off for “User Session Defaults”. Then you can set “Mount at system startup” and add “remove_hiberfile” to the end of the command parameters as shown. Now the drive can be mounted, just click the mount button and you should be set.

‘bash’ A.K.A. The Solution for Everything – A few of the *Special Files*!
In bash, the shell reads one or more startup files. Here’s the details about what’s what and which is run when.
- /etc/profile is executed automatically at login.
- The file from the list of ~/.bash_profile, ~/.bash_login, or ~/.profile are then executed at login.
- ~/.bashrc is executed by every non-login shell, but if sh is used to invoke bash it reads the $ENV for POSIX compatability.
For reference, the ~ symbol is used in place of the user directory. One way to check this out yourself is to change directory to ~ with a cd ~ in the shell, then type pwd which will give the current directory. You’ll find that it is something like /Users/adron where instead of my name it’d be your user name.
When invoking the shell, you can also skip the ~/.bashrc or otherwise change the way bash starts up with the following options.
bash --init-file theFileToUseInsteador--rcfileinstead of ~/.bashrc.bash --norcwhich is similar to invoking withsh, which will use $ENV.bash --noprofilewill prevent /etc/profile or any other personal startup files. This will provide a pretty baseline bash shell for use.
Until next time, happy bash code thrashing!
‘bash’ A.K.A. The Solution for Everything – Bourne Shell as per v7 Unix to Today’s
In 1979 Unix v7 started being distributed with the original Bourne Shell. Simply, it’s a program that sits at /bin/sh and runs in the terminal. You may ask, “what’s the difference between a shell and the terminal?” Let’s cover that right now, because it’s something that routinely isn’t common knowledge, but it really ought to be as it sets the basis for understanding a lot of what is going on in Unix based systems (that includes almost every practical system on a PC, Server, in the cloud, on your phones, and more. Probably easiest to explain it simply as everything that isn’t the Microsoft Windows OS)
A Shell and the Terminal
Terminal – A terminal is the text input and output environment on the system.
Shell – This is the command line interpreter that is run at the terminal.
Another point of context, is that a terminal, shell, and the word console are all used in various ways and sometimes interchangeably. However, these words do not mean the same thing at all. They are distinct individual parts of the system. For example, console, which is used in a strangely disingenuous way all over Microsoft phrasing, is the physical terminal of the system, which is where the system terminal, i.e. the thing I’ve described above, actually runs in so that we can type and interface with it as humans.
Albeit, as English does, these definitions aren’t always taken as the exact, appropriate, and pedantically correct definitions today. For example, many at Microsoft argue that the console is just the terminal, that the terminal is the console. Sure, ok, that’s fine I can still follow along in the conversation, and this adds context, for when someone steps out of line and uses the more historically specific definition in context of a conversation.
Alright, that’s all groovy, so now we can get back to just talking about the shell, all the power it gives the Unix/Linux/POSIX System user, and touch on the terminal or console as we need to with full context of what these things actually are!
 Introducing Bash!
Alright, with that little bit of context around Bourne Shell, let’s talk about what we’ve actually got today running as our shell in our terminal on our console on the computers we work with! The Bourne Shell, years later had a replacement written for it by Brian Fox. He released it in 1989 and over the years it became a kind of defacto replacement of Bourne Shell. The term ‘BASH’ stands for Bourne Again SHell.
 The Bash command syntax is a superset of the Bourne Shell syntax. It provides a wide range of commands that includes ideas drawn from the Korn shell (ksh) and the C shell (csh) such as command line editing, command history, the directory stack, the $RANDOM and $PPID variables, and POSIX command substitution syntax. If many of those things make you think, “WTF are these variables and such?” have no worries, I’ll get to em’ soon enough in this series!
But with that, this is the beginning of many short entries on tips, tricks, tutorials, syntax, history, and context of bash so until next time, cheers!
You must be logged in to post a comment.