
I’m going to enumerate these, because holy hell there’s a number of ways to start working with Vue.js. Since I’m time boxing all of the these posts too and study time in a day, it might take more than one post to get through all of these ways to get started with Vue.js.
Method 1 – Hand Crafted Artisanal Vue App
This is the age old approach, and in my opinion one of the best ways to learn something well, to just hand code up a minimal app from scratch. Doing this with Vue is fairly easy, and as with any web application regardless of framework, begins with two files. For these files, we have:
- index.html – The index.html file is the standard base file of a web app, or more simply the web site. It’s been the default file that displays for a website since pretty much the dawn of the internet using HTML for composing sites!
- main.js – This is the part that initiates the Vue app itself.
Creating the index.html we would need something like this. Note the script file is located on a CDN, and works fine until you don’t have access to the internet (if that were to happen). It’s possible to do the same thing locally by just downloading the vue.js vue.global.js file locally.
<!DOCTYPE html>
<html lang="en">
  <head>
    <meta charset="UTF-8" />
    <title>Minimalistic Vue App</title>
    <script src="https://unpkg.com/vue@3.0.0-beta.12/dist/vue.global.js"></script>
  </head>
  <body>
    <div id="app">
      <h1>{{ appHeader }}</h1>
      <p>{{ appDescription }}</p>
    </div>
    <script src="./main.js"></script>
    <script>
      const mountedApp = app.mount('#app')
    </script>
  </body>
</html>
The JavaScript page, where the invocation of the Vue app is done is loaded via the <script src="./main.js"></script> file, while the Vue framework itself is loaded by the <script src="https://unpkg.com/vue@3.0.0-beta.12/dist/vue.global.js"></script> in the header. Then the app is attached the the div element <dev id="app"> and the elements inside then have various pieces that the Vue framework can then populate based on the capabilities of the framework.
The underlying main.js file looks like this.
const app = Vue.createApp({
    data() {
        return {
            appHeader: 'This is yer Header!',
            appDescription: 'Lorem ipsum dolor sit amet, consectetur adipiscing elit, sed do eiusmod tempor incididunt ut labore et dolore magna aliqua.'
        }
    }
})
Method 2 – Creating a Project via NPM
To use this method start by ensuring you have Node.js and npm installed. I use nvm to get these tools installed and manage which version of these tools I have installed, and have detailed what steps I go through here.
Once the prerequisites are installed issue the following npm init command.
npm init vue@latestThat’s it, next you’ll be prompted for all sorts of additional capabilities one can add to a Vue.js App. The easiest however is just to ignore them all, go with the default of No, and then navigate into the directory made for you, install dependencies, and run the app with the following commands. Which mind you, are listed out when you run the above npm init. Working through this automation your terminal would look something like this.
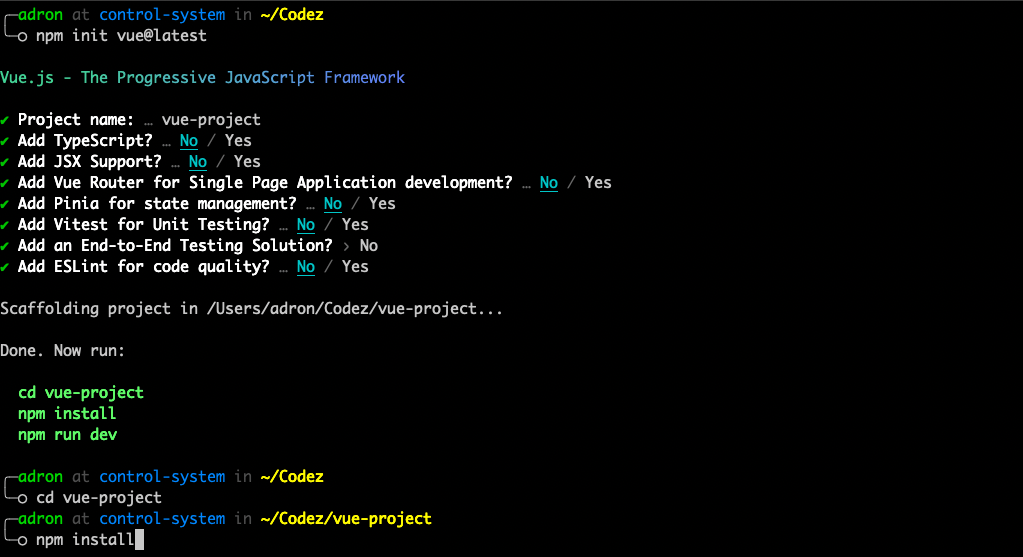
Once all that is done, you then npm install and then issue npm run dev you’ll be presented with the following status.

This shows that your app is now running and available via a VITE server that you can open a browser and navigate to http://localhost:5173 to view. That page will look something like this, which is a smidge more shined than a hand crafted artisanal vue app!

That’s it for today’s notes. I spent an exorbitant amount of time toying around with these things so I’ve only gotten through the two methods. But rest assured, these are effective ways to get your vue app started and get going with that initial development.
You must be logged in to post a comment.