Windows Azure Table Storage Part 1

This is the first part of a two part series on building a basic working web app using ASP.NET MVC to create, update, delete, and access views of the data in a Windows Azure Table Storage Service.  The second part will be published this next Monday.  With that stated, let’s kick off with some technical specifics about Windows Azure Table Storage.

The Windows Azure Table service provides a structured storage in the form of tables.  The table storage you would setup within Windows Azure is globally unique.  Any number of tables can be created within a given account with the requirement that each table has a unique name.

The table storage account is specified within a unique URI such as:

http://myaccount.table.core.windows.net

Within each table the data is broken into collections called entities.  Entities are basically rows of data, similar to a row in a spreadsheet or a row within a database.  Each entity has a required primary key and a set of properties.  The properties are a name, typed-value pair, similar to a column.

Tables, Entities, and Properties

There are three core concepts to know when dealing with Windows Azure Tables; Table, Entities, and Properties.  For each of these core features of the Windows Azure Table Storage it is important to be able to add, possibly update, and delete the respective table, entity, or property.

Windows Azure Table Hierarchy;

  • Table – Similar to a spreadsheet or table in a relational database.
  • Entity – Similar to a row of data in a spreadsheet, relational database, or flat file.
  • Property – Similar to a cell in a spreadsheet or tuple in a relational database.

Each entity has the following system properties; a partition key, row key, and time stamp.  These properties are included with every entity and have reserved naming.  The partition and row key are responsibilities of the developer to insert into, while the time stamp is managed by the server and is read only.

Three properties that are part of every table;

  • Partition Key
  • Row Key
  • Time Stamp

Each table name must conform to the following rules; a name may have only alphanumeric characters, may not begin with a numeric character, are case-insensitive, and must be between 3 and 63 characters.

Tables are split across many nodes for horizontal scaling.  The traffic to these nodes is load balanced.  The entities within a table are organized by partition.  A partition is a consecutive range of entities possessing the same key value, the key being a unique identifier within a table for the partition.  The partition key is the first part of the entity’s primary key and can be up to 1 KB in size.  This partition key must be included in every insert, update, and delete operation.

The second part of the primary key is the row key property.  It is a unique identifier that should not be read, set on insert or update, and generally left as is.

The Timestamp property is a DateTime data type that is maintained by the server to record the entity for last modifications.  This value is used to provide optimistic concurrency to table storage and should not be read, inserted, or updated.

Each property name is case sensitive and cannot exceed 255 characters.  The accepted practice around property names is that they are similar to C# identifiers, yet conform to XML specifications.  Examples would include; “streetName”, “car”,  or “simpleValue”.

To learn more about the XML specifications check out the W3C link here:  http://www.w3.org/TR/REC-xml/.  This provides additional information about properly formed XML that is relatable to the XML usage with Windows Azure Table Storage.

Coding for Windows Azure Tables

What I am going to show for this code sample is how to setup an ASP.NET MVC Application using the business need of keeping an e-mail list for merges and other related needs.

I wrote the following user stories around this idea.

  1. The site user can add an e-mail with first and last name of the customer.
  2. The site user can view a listing of all the e-mail listings.
  3. The site user can delete a listing from the overall listings.
  4. The site user can update a listing from the overall listings.

This will provide a basic fully functional create, update, and delete against the Windows Azure Table Storage.  Our first step is to get started with creating the necessary projects within Visual Studio 2010 to create the site with the Windows Azure Storage and Deployment.

  1. Right click on Visual Studio 2010 and select Run As Administrator to execute Visual Studio 2010.
  2. Click on File, then New, and finally Project.  The new project dialog will appear.
  3. Select the Web Templates and then ASP.NET MVC 2 Empty Web Application.
  4. Name the project EmailMergeManagement.  Click OK.
  5. Now right click on the Solution and select Add and then New Project.  The new project dialog will appear again.
  6. Select the Cloud Templates and then the Windows Azure Cloud Service.
  7. Name the project EmailMergeManagementAzure.  Click OK.
  8. When the New Cloud Service Project dialog comes up, just click OK without selecting anything.
  9. Right click on the Roles Folder within the EmailMergeManagementAzure Project and select Add and then Web Role Project in Solution.
  10. Select the project in the Associate with Role Project Dialog and click OK.

The Solutions Explorer should have the follow projects, folders, files, and Roles setup.

Solution Explorer
Solution Explorer
  1. Now create controller classes called StorageController and one called HomeController.
  2. Now a Storage and Home directory in the Views directory.
  3. Add a view to each of those directories called Index.aspx.
  4. In the Index.aspx view in the Home directory add the following HTML.

[sourcecode language=”html”]
<%@ Page Language="C#" Inherits="System.Web.Mvc.ViewPage" %>

<%:Html.Encode(ViewData["Message"])%>
<h1>
<%:Html.Encode(ViewData["Message"])%></h1>
This ASP.NET MVC Windows Azure Project provides examples around
the Windows Azure Storage usage utilizing the Windows Azure SDK.
<ul>
<li>
<%:Html.ActionLink("Windows Azure Table Storage", "Index", "Storage")%></li>
</ul>
[/sourcecode]

  1. In the Storage directory Index.aspx view add the following code.

[sourcecode language=”html”]
<%@ Page Language="C#" Inherits="System.Web.Mvc.ViewPage" %>

<%: Html.Encode(ViewData["Message"])%>
<h1>
<%: Html.Encode(ViewData["Message"])%></h1>
[/sourcecode]

  1. In the StorageController add this code.

[sourcecode language=”csharp”]
using System.Web.Mvc;

namespace EmailMergeManagement.Controllers
{
public class StorageController : Controller
{
public ActionResult Index()
{
ViewData["Message"] = "Windows Azure Table Storage Sample";
return View();
}
}
}
[/sourcecode]

  1. In the HomeController add this code.

[sourcecode language=”csharp”]
using System.Web.Mvc;

namespace EmailMergeManagement.Controllers
{
public class HomeController : Controller
{
public ActionResult Index()
{
ViewData["Message"] = "Windows Azure Storage Samples";
return View();
}
}
}
[/sourcecode]

Now the next step is to get our Models put together.  This section will include putting together the class for the Email Merge Listing Model, the repository class for getting the data in and out of the table, and the context object that is used for connecting to the actual Development Fabric or Windows Azure Table Storage.

Solution Explorer
Solution Explorer
  1. First add the following references; System.Data.Services.Client,  Microsoft.WindowsAzure.CloudDrive, Microsoft.WindowsAzure.Diagnostics, Microsoft.WindowsAzure.ServiceRuntime, and Microsoft.WindowsAzure.StorageClient to the project by right clicking on the References virtual folder for the EmailMergeManagement Project.
  2. Once you add these references create a class in the Models folder called EmailMergeModel and add the following code.  I’ve added some basic validation attributes to the Email, First, and Last Properties of the EmailMergeModel Class just so that it has a little more semblance of something you may actually see in real world use.

[sourcecode language=”csharp”]
using System;
using System.ComponentModel.DataAnnotations;
using Microsoft.WindowsAzure.StorageClient;

namespace EmailMergeManagement.Models
{
public class EmailMergeModel : TableServiceEntity
{
public EmailMergeModel(string partitionKey, string rowKey)
: base(partitionKey, rowKey)
{
}

public EmailMergeModel()
: this(Guid.NewGuid().ToString(), string.Empty)
{
}

[Required(ErrorMessage = "Email is required.")]
[RegularExpression("^[a-z0-9_\\+-]+(\\.[a-z0-9_\\+-]+)*@[a-z0-9_\\+-]+(\\.[a-z0-9_\\-]+)*\\.([a-z]{2,4})$",
ErrorMessage = "Not a valid e-mail address.")]
public string Email { get; set; }

[Required(ErrorMessage = "First name is required.")]
[StringLength(50, ErrorMessage = "Must be less than 50 characters.")]
public string First { get; set; }

[Required(ErrorMessage = "Last name is required.")]
[StringLength(50, ErrorMessage = "Must be less than 50 characters.")]
public string Last { get; set; }

public DateTime LastEditStamp { get; set; }
}
}
[/sourcecode]

  1. Now add a class titled EmailMergeDataServiceContext for our data context.  This class provides the basic TableServiceContext inheritance that allows for creation of the table, entities, and properties through the Windows Azure SDK.
  2. Add the following code to the EmailMergeDataServiceContext Class.

[sourcecode language=”csharp”]
using System.Linq;
using Microsoft.WindowsAzure;
using Microsoft.WindowsAzure.StorageClient;

namespace TestingCloudsWebApp.Models
{
public class EmailMergeDataServiceContext : TableServiceContext
{
public const string EmailMergeTableName = "EmailMergeTable";

public EmailMergeDataServiceContext(string baseAddress, StorageCredentials credentials)
: base(baseAddress, credentials)
{
}

public IQueryable EmailMergeTable
{
get { return CreateQuery(EmailMergeTableName); }
}
}
}
[/sourcecode]

  1. Create a class in the Models directory called EmailMergeRepository.  This is the class I will use to add the insert, update, and delete functionality.
  2. Now add a constructor and private readonly EmailMergeDataServiceContext member as shown below.

[sourcecode language=”csharp”]
private readonly EmailMergeDataServiceContext _serviceContext;

public EmailMergeRepository()
{
var storageAccount = CloudStorageAccount.
FromConfigurationSetting("DiagnosticsConnectionString");
_serviceContext =
new EmailMergeDataServiceContext(
storageAccount.TableEndpoint.ToString(),
storageAccount.Credentials);

storageAccount.CreateCloudTableClient().
CreateTableIfNotExist(
EmailMergeDataServiceContext.EmailMergeTableName);
}
[/sourcecode]

  1. Next add the select and get by methods to retrieve EmailMergeModel Objects.

[sourcecode language=”csharp”]
public IEnumerable<EmailMergeModel> Select()
{
var results = from c in _serviceContext.EmailMergeTable
select c;

var query = results.AsTableServiceQuery();
var queryResults = query.Execute();

return queryResults;
}

public EmailMergeModel GetEmailMergeModel(string rowKey)
{
EmailMergeModel result = (from c in _serviceContext.EmailMergeTable
where c.RowKey == rowKey
select c).FirstOrDefault();
return result;
}
[/sourcecode]

  1. Next add a method to add our custom date & time stamp for inserts and updates.

[sourcecode language=”csharp”]
private static EmailMergeModel StampIt(EmailMergeModel emailMergeModel)
{
// This is a sample of adding a cross cutting concern or similar functionality.
emailMergeModel.LastEditStamp = DateTime.Now;
return emailMergeModel;
}
[/sourcecode]

  1. Finally the delete, insert, and update methods can be added.

[sourcecode language=”csharp”]
public void Delete(EmailMergeModel emailMergeModelToDelete)
{
_serviceContext.Detach(emailMergeModelToDelete);
_serviceContext.AttachTo(EmailMergeDataServiceContext.EmailMergeTableName,
emailMergeModelToDelete, "*");
_serviceContext.DeleteObject(emailMergeModelToDelete);
_serviceContext.SaveChanges();
}

public void Insert(EmailMergeModel emailMergeModel)
{
_serviceContext.AddObject(EmailMergeDataServiceContext.EmailMergeTableName, StampIt(emailMergeModel));
_serviceContext.SaveChanges();
}

public void Update(EmailMergeModel emailMergeModelUpdate)
{
var emailMergeModelOld = GetEmailMergeModel(emailMergeModelUpdate.RowKey);
Delete(emailMergeModelOld);
Insert(StampIt(emailMergeModelUpdate));
}
[/sourcecode]

  1. At this point the Solution Explorer should have the following files and structure.
Storage Explorer
Storage Explorer

That’s it for part 1 of this two part series.  The next entry I’ll have posted this coming Monday, so stay tuned for the final steps.  🙂

Shout it

What You Need and Want With Windows Azure Part II

One of the most useful tools to use in Windows Azure Development is the Windows Azure MMC.  The Microsoft Management Console, or MMC, is the management console that many of the Windows Server Management interfaces can plug into.  The Windows Azure Team has put together the Windows Azure specific MMC Console Plugin that is available for download on Microsoft MSDN Code Site at http://code.msdn.microsoft.com/windowsazuremmc.


Windows Azure MMC Code Site


When you navigate to the page, click on the tab for downloads and you will find three different files;

  • WindowsAzureMMC.exe
  • PerfMon-Friendly Log Viewer Plugin
  • PerfMon-Friendly Log Viewer Plugin (Source Only)

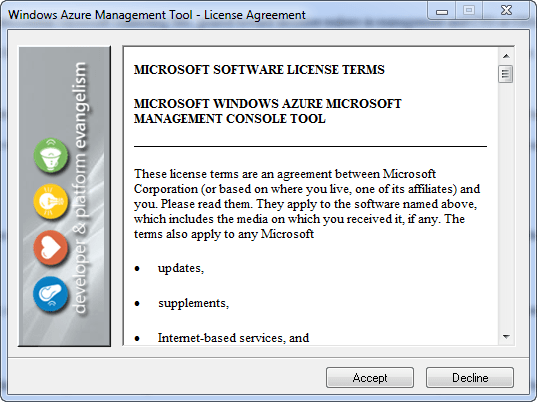
The main file you’ll need to download is the WindowsAzureMMC.exe file.  Once this file is downloaded, run the executable.  An installation wizard will appear, just click next and step through each of the steps accepting any defaults.


Windows Azure Management Tool Installation


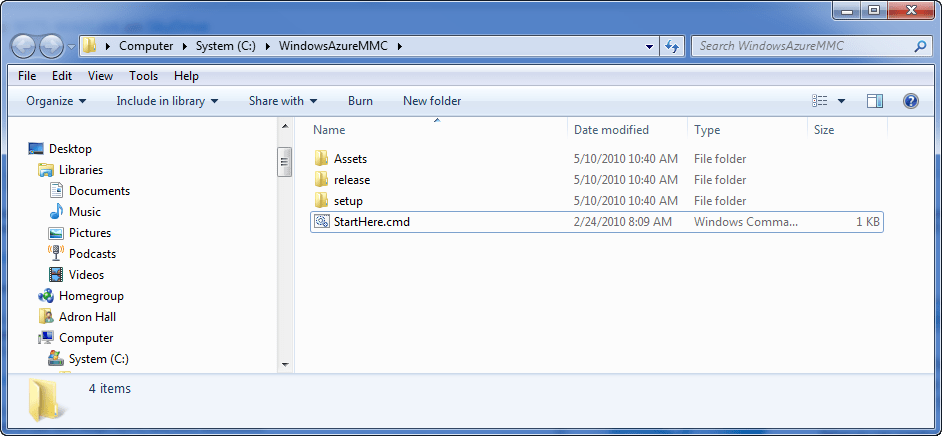
Once the executable runs it should pop up a Windows Explorer Window, if not navigate to where the files where just installed (unzipped) to.  By default the installer places them in C:\WindowsAzureMMC\.  Find the file StartHere.cmd located in the installation directory and fun the file.


StartHere.cmd
StartHere.cmd


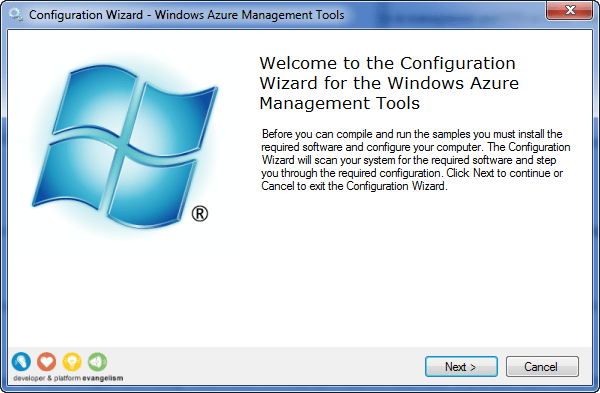
When the file is executed a DOS prompt will flicker, and another configuration wizard titled Windows Azure Management Tools will appear.


Configuration Wizard for the Windows Azure Management Tools


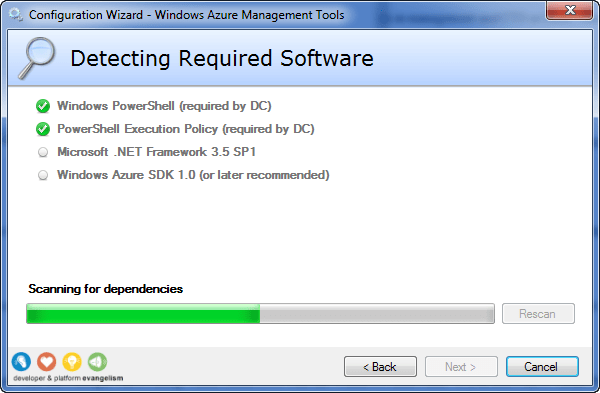
Click next and the installation will start, checking each of the dependencies required to execute the MMC.


Detecting Required Software


Continue to click any next prompts, and then you will have the Windows Azure MMC Console open once the StartHere.cmd finishes executing.  Click close on the configuration wizard.


Installation Completed


The MMC will now be displayed on screen as shown below.


Windows Azure Management Tool (MMC)


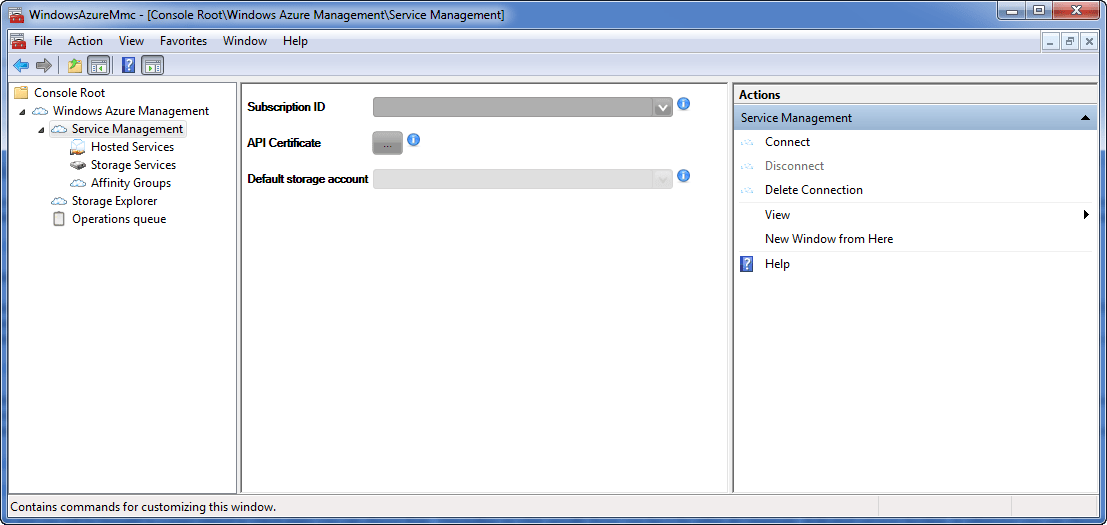
Open the Windows Azure Management section by clicking on the small tree view arrow on the left hand side.  The tree view will open up to a Service Management Node with a Hosted Services, Storage Services, and Affinity Groups listed underneath the node.  Select the actual Service Management Node so that the middle window shows the connection form shown here.


Windows Azure MMC Services Management Node Connection


Now navigate back to Windows Azure Platform Web Interface (http://windows.azure.com).  Click on the project displayed on the main screen to select it.


Windows Azure Portland Interface


When the follow page displays, click on the Account tab at the center top of the page.


Windows Azure Project


When the Account Page finishes rendering look at the very bottom to locate the subscription ID.


Windows Azure Project Account Properties


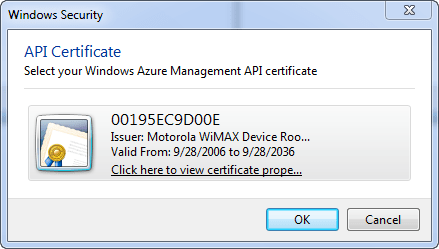
Enter the subscription ID into the form.  Now click on the ellipsis button on the form so the certificates that are available are displayed.


API Certificate
API Certificate


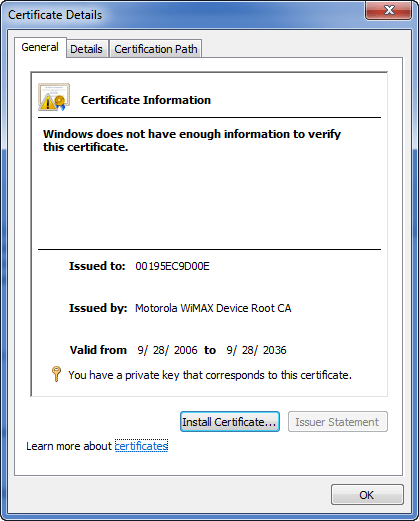
Click on the underlined link on the certificate you want to use (sometimes there are a few options, depending on what is installed on the machine already).  A properties dialog should appear when you click on the underlined link button.


Certificate Details
Certificate Details


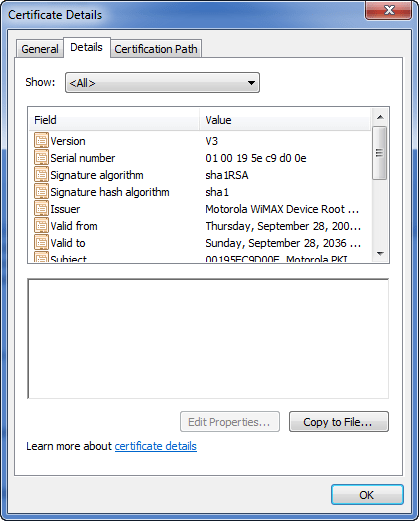
Click on the Details Tab on the top of the properties dialog window.


Certificate Details, Details Tab


Now click on the Copy to File Button.  An export process will start for the certificate.  Click on next.  On the next screen make sure No, do not export the private key is selected.  The next screen selects the DER encoded binary X.509 (.CER) option.  Verify this setting and then click next.


Certificate Export Wizard


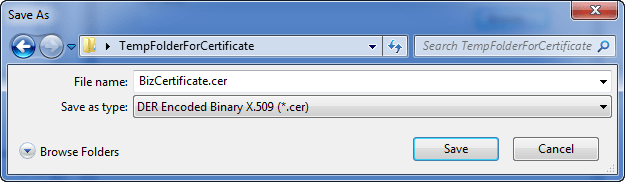
Click on next and then enter the path and filename where you want to save the certificate.


Save As File Name for Certificate


Now that you have the certificate, return to the Windows Azure Platform Web Interface (http://windows.azure.com).  Navigate to the Account Tab section of the site again.  On that page click on the Manage My API Certificates.  This is the same page as shown above in the image captioned “Windows Azure Project Account Properties“.  Once the page displays click on the Choose File button on the page.  Find the location the certificate was saved and select the certificate.  Now click the upload button to upload the file to the Windows Azure Account.


API Certificates Upload


When the file is done uploading the page will update and show something similar to what is shown in the next screenshot.


API Certificates, Finished Uploading


Now you can click on the OK button, if you haven’t already, to confirm the API Certificate in the Windows Azure MMC.  Click on the Connect button in the far right window area of the MMC.  It should take a second but the connection should occur.  You can tell by the Default storage account form drop down becomes enabled.  At this time though, since we haven’t placed anything in storage or started any storage services there will be nothing displayed in the drop down.

At this point the MMC is functional; there just isn’t much to look at in the Windows Azure Account yet.  So let’s change that and setup some sample services.  First head back over to the Windows Azure Platform Web Interface (http://windows.azure.com).  Once you’re in click on the project as we did before so that it is the focus point.  Click on the +New Service link in the top right of the main page window section.


Starting a Windows Azure Service


The next screen will display the options to create a Windows Azure Storage Account or a Hosted Services Role.  Click on the Windows Azure Storage Account option.


Windows Azure Create a Service


On the screen that renders fill out the service label and description.  Both of these fields are mostly free text, allowing spaces and special characters.  Click next when you have filled out the label and description.


Services Properties
Services Properties


The next form that comes up has the public storage account name.  This field must be compliant with URI naming conventions.  The idea also is that these storage services use a RESTful API, it is best to follow the REST Architecture ideals and name the location something easy to read and to remember.  You can click the check availability button to verify if the name is used or not.  If it is available move down and select Anywhere US for the region.


First Storage Sample


Once you are finished click the create button at the bottom of the form.  The next window will render the results of creating the Windows Azure Storage Account.  This page has all the information you’ll need to fill out the Windows Azure MMC connection information.


Windows Azure Storage Account Properties


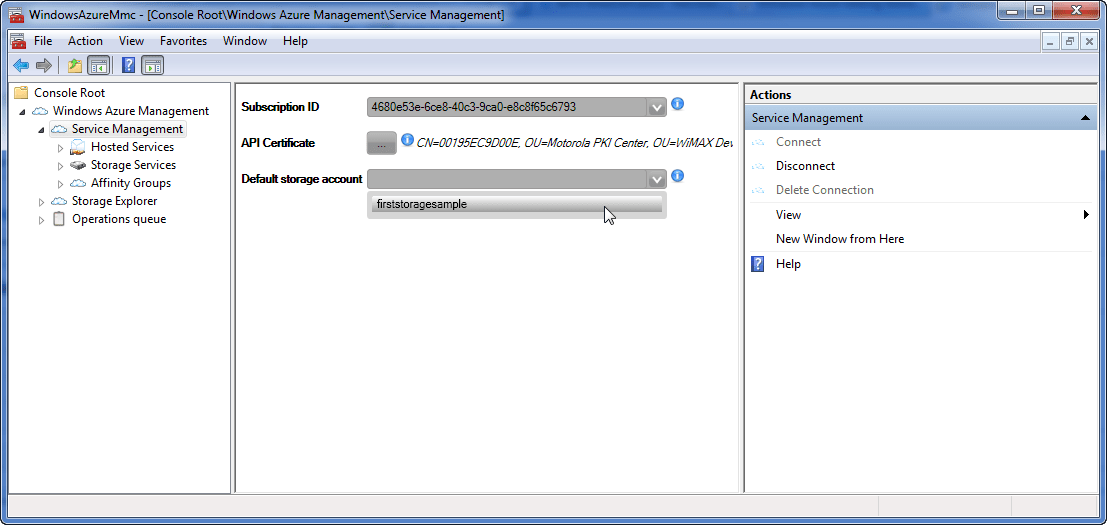
If you still have the Windows Azure MMC open, bring focus to it again.  If not open it back up and open the Windows Azure Management tree view back to the Service Management Node and verify or enter the information for the subscription ID and API Certificate.  Now click on the Connect link button on the right hand window pane.  The MMC will then connect and will populate the Default storage account drop down.  Click on the drop down and you will see your Windows Azure Storage Account that we just created.


Service Management Node Connected with Default Storage Account


Now that we have a Windows Azure Storage Account, let’s get a Windows Azure Services Role running also.  Navigate back to the Windows Azure Platform Web Interface (http://windows.azure.com).  Once the page has rendered click on your specific project, wait for that page to render and  then on the +New Service link. This time select the Windows Azure Services Role to create.  On the next page fill out the service label and description the same as with the Windows Azure Storage Account creation.


Create a Service (Role)


Click next when complete.  On the next page that renders you’ll again pick a public URI subdomain path, which I’ve used firstservicesample as mine, and select Anywhere US from the drop down for the region.  Click on the create button when complete.  The following page will display with a single cube image in the center of the screen, label Production.  For now, the instance role is available, but nothing is deployed and nothing is being charged at this time.  However this is perfect for checking out the Windows Azure MMC display of the services.


Service Role
Service Role


Return to the Windows Azure MMC and click on the Hosted Services node.  Click on Connect in the right hand window pane under actions.  The firstservicesample node, or whatever you may have named the service, will display with the staging, production, and certificates nodes appearing below.  From here you can deploy, upgrade, run, delete, suspend, swap, or even save the configuration of your roles.  This is extremely helpful so that one doesn’t always need to return to the site and can maintain multiple hosted services, storage services, affinity groups, and more from the MMC.


Windows Azure Staging


Next let’s click on the Storage Explorer Node just below the Service Management Node.  Click on New Connection and enter the Account Name as shown below.


New Account Form
New Account Form


Now that the account name and URIs are filled out.  Return to the storage services properties page in the Windows Azure Platform Web Interface (http://windows.azure.com).


Windows Azure Storage Account Properties


On this page you’ll find the key you need to finish off the form in the Windows Azure MMC.  Once you’ve completed the form click on OK.  The MMC should now populate out the cloud storage account area with a node for BLOB Containers.


Storage Account Services


Click on the BLOG Containers so and click on Add Container in the right hand side window pane under actions.  Enter a name, in this case I entered musicmanager, and click OK.  Now you should have a BLOB Storage Container in your Windows Azure Storage Account.


Windows Azure BLOB Container


Click on the musicmanager BLOB Container, or whatever you named yours, and then click on Upload BLOB under the actions window on the right hand side.  Select a file, I’ve chosen a music MP3 I have on my local machine.


Uploading a BLOG File (A Music MP3)


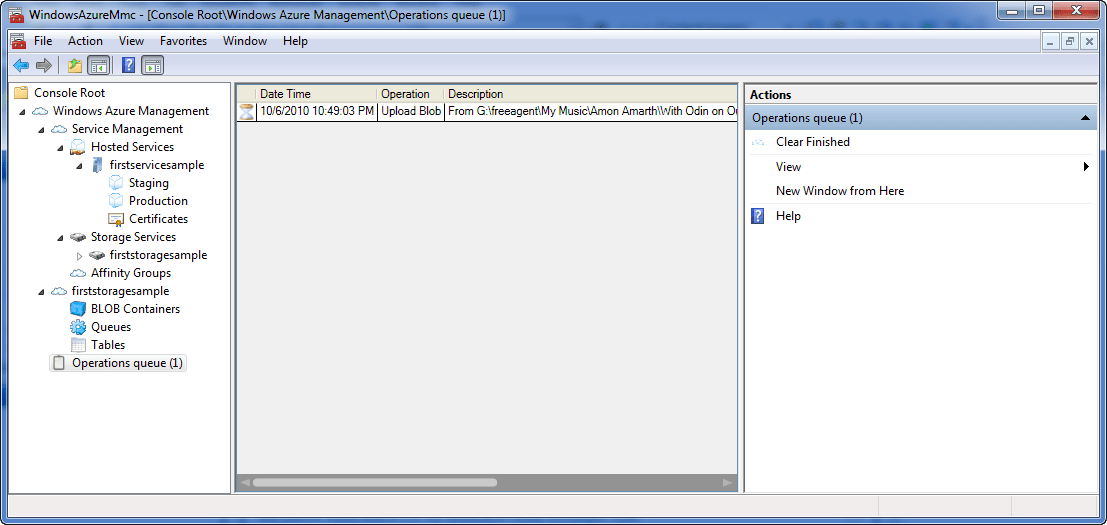
Click OK and you’ll see the Operations queue node on the lower left hand side of the Console Root tree view populate with the upload activity task.


The Upload in the Operations Queue


After the upload is complete the BLOB Container will then show the BLOBs just below it when selected in the Windows Azure MMC.

What You Need and Want With Windows Azure Part I

The first thing needed is a Windows Azure Account, which is simply a Live ID.  The easiest way to setup one of these is to navigate to http://www.live.com and click on the Sign Up button.  If you have an existing account that you use to login it should display on this page also.


Windows Live ID Sign Up


After creating or logging in with an existing account let’s take a look at the various web properties Microsoft has dedicated to Windows Azure.

This site is the quintessential Microsoft Windows Azure Marketing Site, geared toward decision makers in management and CTO or CIOs.  There are links to many other web properties that Microsoft has setup from this page.  It’s a great starting point to find management and executive selling points such as white papers, case studies, co-marketing, and more.


Microsoft Windows Azure


The MSDN Site is the central developer resource Microsoft provides online.  The site recently underwent a massive redesign of almost every element.


MSDN Site
MSDN Site


MSDN Developers site is a requirement to bookmark.  This has the shortest navigation to all the sites and services you’ll need for Windows Azure Development.  There is even a login link to the Site #4 below.  In addition there are several key sections of this site; blogs, news, and more information.


MSDN Windows Azure Site


The Windows Azure Portal site is where we’ll be setting up the roles, storage, and other cloud computing mechanisms that we’ll be writing code against.  Now that each of these sites is reviewed, let’s move forward.

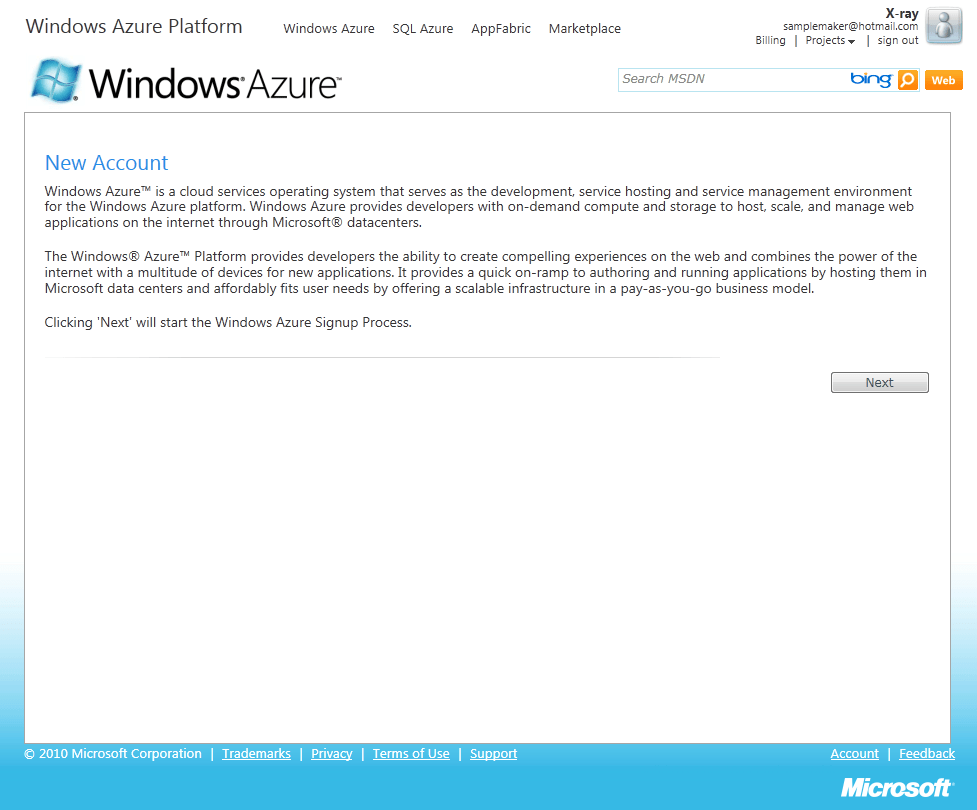
The Windows Azure Portal Site will prompt you to sign up for a cloud services plan.


Signing up for a Windows Azure Service


Click on next and you will be brought to a page related to which plans you can choose from.  Depending on what specific focus you have for either development, dedicated services hosting, or otherwise you can choose from the multiple plans they have.  I won’t go into them here, as Microsoft regularly changes the plans for specials and based on market demand and current costs.


Signing up for a specific plan.


After choosing which plan you will be redirected to the billing site, https://mocp.microsoftonline.com/, to setup a line of credit, confirm the type of Windows Azure Subscription you want to start with, and other information as needed.  Once this is setup, you most likely won’t need to look at this site again except to verify billing information, change billing information, or confirm cloud usage.


Microsoft Billing
Microsoft Billing


Now that there is an account available, we’ll need to install the latest development tools for coding solutions for the cloud.  This first example will be using Visual Studio 2010 with the Windows Azure SDK.  If you don’t have Visual Studio 2010 installed yet, go ahead and install that.  Open up Visual Studio 2010 next.  We will use Visual Studio 2010 project templates to find out the latest Windows Azure SDK and download it.
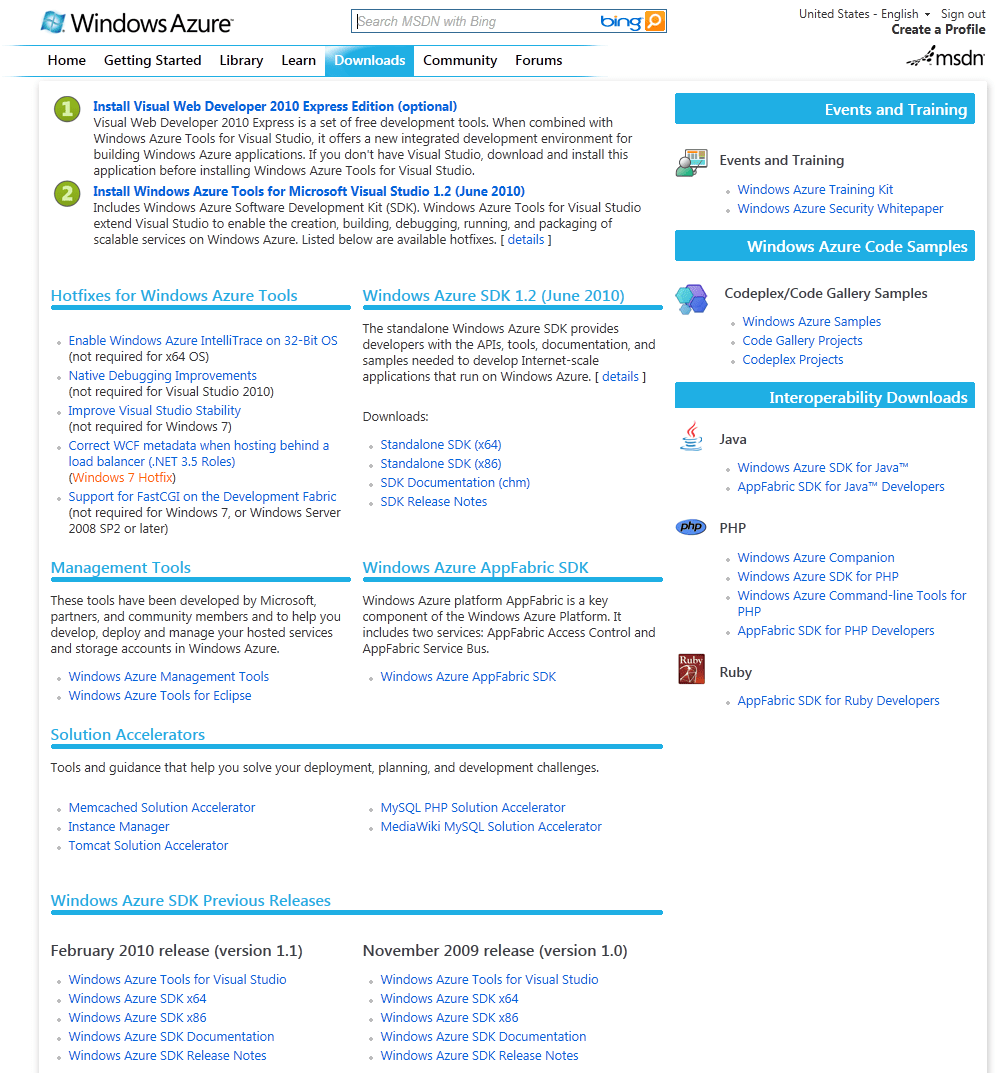
To download the latest Windows Azure SDK navigate to the MSDN Windows Azure Developers Site and click on the Downloads option at the top of the site.


MSDN Windows Azure Download Section


Once you have downloaded and installed the latest Windows Azure SDK we will download and install the Windows Azure AppFabric also.  Scroll down midway on the MSDN Windows Azure Download page and the Windows Azure AppFabric SDK should be available for download.  On the Windows Azure AppFabric SDK download page there should be a *.chm help file, two different AppFabric SDK Examples files one for VB and one for C#, and two installation packages one for 64-bit and one for 32-bit.  Download and install the one for your particular system.  I’d suggest downloading the samples also and giving each a good review.

In What You Need and Want With Windows Azure Part II I will cover how to setup the Windows Azure Microsoft Management Console.  So stay tuned, that is coming tomorrow.

Tip To The MSDN Team, Props on the Site

Yesterday I wrote a somewhat critical blog entry to Microsoft regarding their completely unintelligible use of domains, subdomains, and messaging around products.  I’m not sure who exactly is responsible, but I hope they read it.  I didn’t mean it as a personal attack or anything, just simply as a “please get yourself in line and respect what you do” type of message.

So that leads me to this open letter.  This open letter is primarily about giving props for a job well done on the site redesign of MSDN.  First off though I want to mention one thing.

Tip #1 – The URL is still a bit funky with the .aspx and en-us in it.  Clean that thing up. http://msdn.microsoft.com/en-us/default.aspx should look more like http://msdn.microsoft.com/ and that’s it.  NOTHING else.  At least get rid of the “default.aspx” page hanging around there.  Almost every major framework stack; PHP, Ruby on Rails, etc has removed the index.htm and at least left clean RESTful URIs.  It is a beautiful thing, make yours beautiful too.

Ok, now for the props!

Dear MSDN Team,

I wanted to write this open letter and commend the team on the redesign of the MSDN Site.  First let’s take a look at the MSDN Site.

MSDN Site Home Page
MSDN Site Home Page

At the very top of the page two things I like immediately.  Some UX Folks might not, but I dig the UX design around the UI for the four links; desktop, web, cloud, and phone.  The simple nature, basic styles of the blocks, and the hover over effect creates a very immediate communication of what each is focused around.  I read blog entry by Pete Brown about the MSDN and these blocks, which Microsoft’s Team dubbed “Hubs”.  There is a FAQ also available on the redesign.

The other point I’d like to draw attention to is that someone put the news on the upper part of the page.  Here I caught the “Visual Studio Lightswitch” News bit.  Of course, one could say it’s just a big add, but it really is more about MSDN news bits.  But I digress, I like that the upper section has that instead of digging around for it.

The sections below that have various links, that often don’t show up on the initial page display.  Scrolling down to search through this information is acceptable though, as it is something one would dig through and have intent around something very specific.

desktop

desktop
desktop

The desktop section of the site is setup following the new guidelines around simplification of data presentation.  This is something that has been sorely needed on MSDN for years.  Not sure if one remembers the nasty nested to the Nth degree treeview on the left hand side.  I don’t know where it went, but I’m really happy it is gone.  Now the layout is simple and to the point, with the key points of information being laid out in multiple steps.

web

The web section, again follows this new redesign model of user experience.

web
web

cloud

The cloud section again follows this new redesign…

cloud
cloud

phone

This too follows the redesign.  Simple, clean, and straight forward presentation of information.

phone
phone

I also like how the messaging around the primary platforms is clear.  It almost doesn’t’ seem like marketing is involved, which in my opinion is the best type of marketing.  When marketing kind of acts as the librarian that is helping you to find that key piece of information.  It’s very cool, it’s almost kind of cool in a way.

To summarize, I’m impressed.  MSDN Team, you guys have done a great job.  Props!

A Frequent Business User and Customer,
Adron @ Composite Code

That’s it for open letters for a while.  Now I’m off to do a bit of coding with Azure for the Phone using Visual Studio 2010.  🙂
Some Constructive Criticism to Microsoft Web Properties Leadership

Dear Microsoft Web Properties Leadership,

I’m a user of the various web sites that Microsoft releases on a daily basis.  I work with, for, and around Microsoft web sites to complete my daily work in software development.  However, the way the domains, sub-domains, and other web related properties are organized is often difficult to remember, use, and generally frustrating on many levels.  I know there are no hard rules for domains, sub-domains, etc, but there are some ideals and guidelines behind the usage of such things.  Life for the technical community would be much easier if you guys actually followed these ideals and guidelines.  Let me provide a prime example of a service I have to use regularly.

BPOS (and I’m not defining what BPOS is, because this is part of the issue…)

Before even using it, I’ll start by searching for it.  To provide what a new user of the system may see if they’re trying to sign up or such.  If I navigate to a search engine, I’ll use Bing for this particular example, and try to find out about Microsoft BPOS Services I get the following results.

Bing Results for "Microsoft BPOS"
Bing Results for "Microsoft BPOS" (Click the image for a full size rendering)

These are good results, so no problem yet.  Now with some basic intuitive analysis of the results I have the following obvious Microsoft Properties to check out.  At least, I hope that I do.

This is one of the more straight forward results for a product.  Setting us on a good path, so let’s take a look at each of these sites.

First the http://www.microsoft.com/online/default.aspx, which gives us this page.

Microsoft BPOS Site Property #1
Microsoft BPOS Site Property #1 (Click the image for a full size rendering)

There are some glaring issues with the page itself, but first take note of that URI.  That’s a nasty URI for the main root page to begin with.  It ends with *.aspx, and there is a sub path which an Internet power user wouldn’t be able to understand let alone a novice or standard business user.  Let’s go through the red arrows real quick.  I’ll hit on each arrow in order from top to bottom.

Ok, before continuing with the domain & sub-domain issue, let me step into another concern here.  There are the two choices for a Free Trial or Buy Now.  These two options are not that bad, but look below a big $10 sign, only $10 dollars!?  NO.  It’s $50 dollars not $10.  In the small print, the third red arrow, it states you will need to order a minimum of 5 users, which equates to $50 dollars.  I think somebody at Microsoft should clean this up a bit, at first glance it is misleading.

I know this isn’t a sub-domain or domain naming issue, as I started with, but I just want to point this out as it is a problem for reputation.  So my first critique tip is…

Critique Tip #1 – Clean up the selling point on the page and don’t be misleading.

Fourth arrow is a pet peeve of mine.  Again, not to the domain and sub-domain issue yet, but I want to tackle these because they’re frustrating.  For some reason Microsoft expects everyone to scroll way down their pages to find out news about the product.  In addition, as the last arrow points out, it is also assumed that everyone always understands all of Microsoft’s Acronym Soup.  No, we don’t Microsoft, you’re making these up.  So please actually write some regular, intelligible titles for products or use some of those awesome secret names as product names.  People would LIKE IT if you did.  I want you guys to succeed with some of these services too, and writing headlines like this, in a news section that is at the bottom of the page, and not easily accessible and up front isn’t doing you guys any favors.  I’m trying to help out here.

Critique Tip #2 – Give us the news higher on the page, where it is easy to find, and write the articles for people that may not work for Microsoft itself.

The next link is I suppose another page related to BPOS from Microsoft.  http://microsoftbpos.net/ is navigated to and I find this.

A BPOS Company?
A BPOS Company?

Nope, this is NOT a Microsoft property.  But being there are so many Microsoft Properties with no rhyme or reason to the domain and sub domain usage, this seemed like a legitimate Microsoft Site.  It isn’t Microsoft’s fault that this link is a little misleading, but if one is looking for a company to handle this confusion for them, this may be a great company.  Otherwise, I’m moving on to the next link.

The next link is http://microsoftbpos.com/. This one has to be a Microsoft Site, I hope.

Business Productivity Online Standard Suite (BPOSS??)

Yup, we’re good.  But it is confusing isn’t it.  What exactly is BPOSS anyway?  I thought I searched for BPOS?  Is this BPOS?  Maybe just another S on the end?  Anyway, I digress.

No intuitive use of the domains going on here.  Two completely autonomous and separate domains being used for the same business within Microsoft.  Not cool, Microsoft you are driving down the WRONG way on the road with this.  Even if there is differences between this and the other BPOS site, it isn’t immediately apparent and they come back in the same search results.  So if they are different, SEO #fail.

Again, there are standard UX no no’s at work here too.  News is at the bottom in a little right hand corner box.  The same sales point is being made, $10 per user, which isn’t inherent to the real base cost, and those same two buttons are there to simply lead users into purchasing without realizing what they’re getting.  Last, the page is too long.  We don’t need to scroll down so far and there does NOT need to be a big huge Bing search at the top.  This is the type of activity I’d expect from Black Hat SEO Hacks trying to get higher SEO ranking illegally, NOT from Microsoft.

Tip #3 – A single domain for a single business segment or use a sub-domain off of the microsoft.com domain such as http://bpos.microsoft.com or http://onlineproductivitysuite.microsoft.com.

The last link is definitely Microsoft, as it hangs off of the microsoft.com domain.  http://www.microsoft.com/business/bpostestdrive/demo.aspx?CR_CC=200000034&WT.srch=1&CR_SCC=200000034&WT.srch=1 maybe it just has some simple info on it but isn’t, yet another, landing or portal page for the product?  It couldn’t be right?  Wrong again.  It is a primary landing page with all that nasty URI query string nonsense.

Ahh, a nice looking BPOS Site!!

This site, I have to admit, seems better.  Tabs at the top, no pointless Bing search at the top, and actual topic points of concern in the center of the page.  Whoever this group is, design the other pages.  Better yet, get rid of the other pages and go with this design.  This isn’t the best page, but it’s 10x better than the others.

Tip #4 – Use this site as a reference for creating a single BPOS site with appropriate navigation, section on the page, move the news up to the forefront, and get the site re-published.

That’s it for this critique.  Microsoft representatives, management, and others please take heed.  I’m honestly trying to write an entertaining yet constructively critical entry here as a sort of open letter, it may seem I’m attacking, but from outside (or inside) Microsoft it is difficult to get things like this fixed.

I hope this helps.  😉  Cheers to a good solution!

A Frequent Business User and Customer,
Adron @ Composite Code

PS:  I’ll be following this open letter tomorrow with a letter providing props for some awesome sites, UX, and general offerings that Microsoft has put together.  So I didn’t just write this to hate on Micrsoft, I’m just frustrated intently by their blatant bad usage around domains, sub-domains, etc.

So stay tuned, I’ve got props coming instead of all this grumbling.  Cheers!