
Enhanced session mode provides significantly higher performance, hardware utilization, and things like copy & paste between the host and the VM. To make the best use of the VM as a work station this feature is a must have. However, an Ubuntu (or other) installation doesn’t have this capability provided by default, additional software and steps are required to get it working. Those steps are what follows.
1. Configure VM and Install Ubuntu.
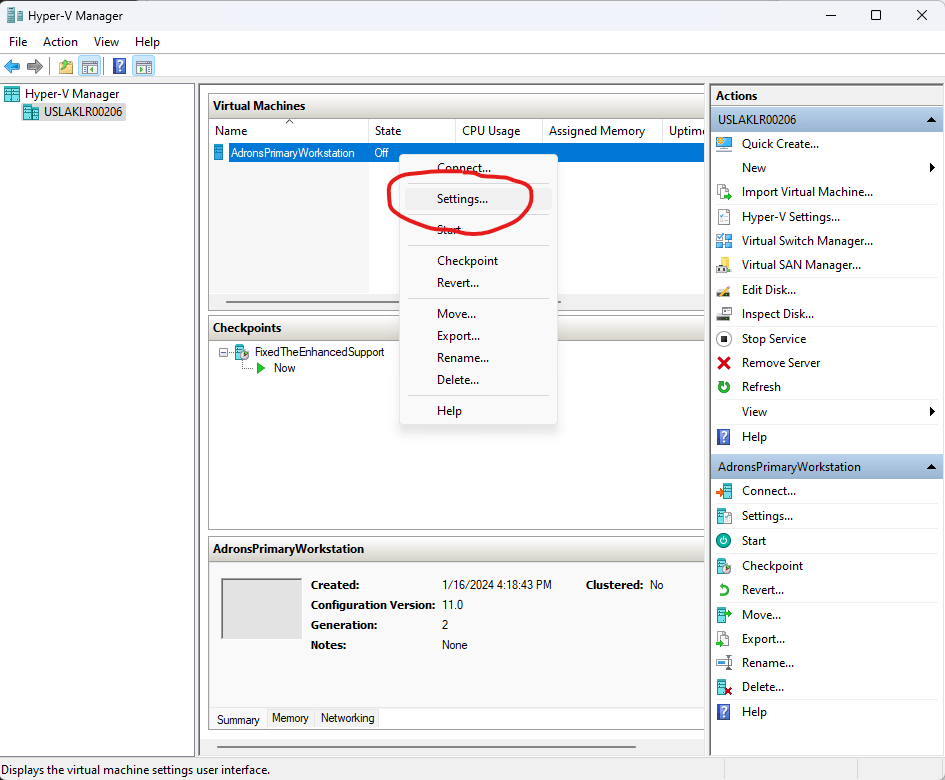
Extended session mode requires several features be enabled when setting up the VM for the installation of a guest OS. Configuration for the VM, done via the wizard when creating a new VM, but also available by right click and clicking on settings as shown.
Generation 2
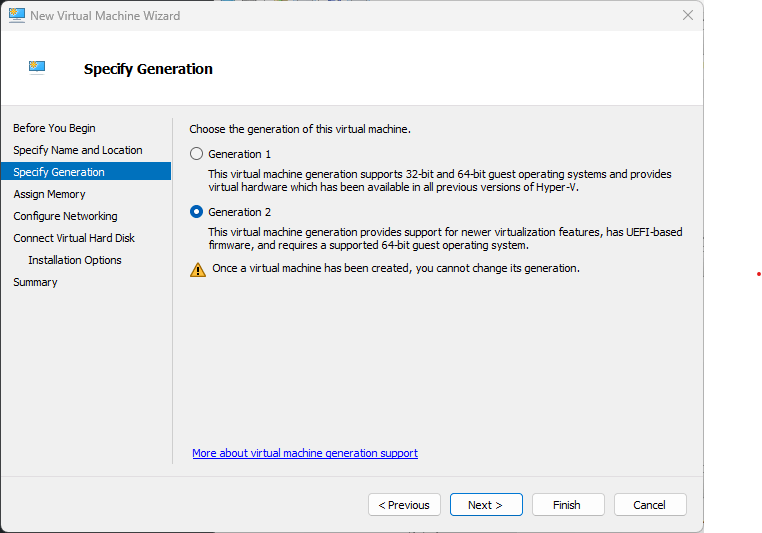
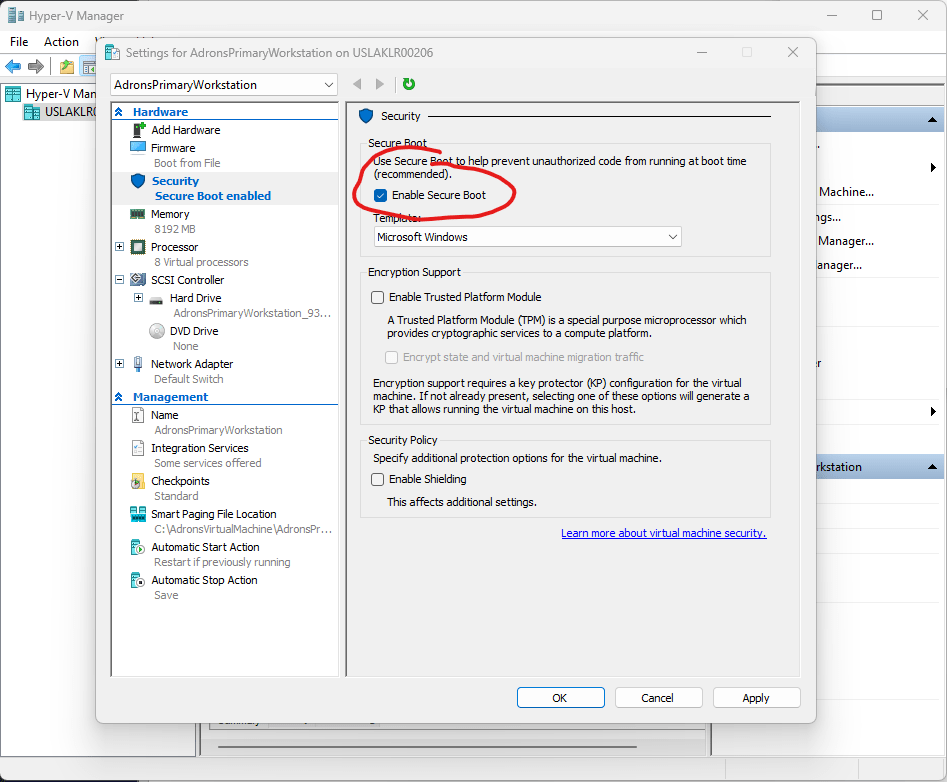
Secure Boot Disabled
Stepping through the Ubuntu installation there are some key steps to make sure are taken. Make sure to setup the username and password, and have the login required. Do NOT set the Ubuntu instance to log in automatically.
2. Install XRDP and XORGXRDP
Before getting into the install, make sure apt is all up to date.
apt update && apt upgrade -y2a. Install hv_kvp utils. Run these installations where HWE can be set to the kernel version like show.
apt install -y linux-tools-virtual${HWE} apt install -y linux-cloud-tools-virtual${HWE}HWE packages could be set like this.
HWE=""or
HWE="-hwe-20.04"2b. Install the xrdp service for appropriate auto starting behavior.
apt install -y xrdp2c. Setup autostart for xrdp.
systemctl stop xrdp
systemctl stop xrdp-sesman
2d. Configure the installed xrdp ini files now.
sed -i_orig -e 's/port=3389/port=vsock:\/\/-1:3389/g' /etc/xrdp/xrdp.ini
sed -i_orig -e 's/security_layer=negotiate/security_layer=rdp/g' /etc/xrdp/xrdp.ini
sed -i_orig -e 's/crypt_level=high/crypt_level=none/g' /etc/xrdp/xrdp.ini
sed -i_orig -e 's/bitmap_compression=true/bitmap_compression=false/g' /etc/xrdp/xrdp.ini
2e. Add setup script for Ubuntu sessions.
if [ ! -e /etc/xrdp/startubuntu.sh ]; then
cat >> /etc/xrdp/startubuntu.sh << EOF
#!/bin/sh
export GNOME_SHELL_SESSION_MODE=ubuntu
export XDG_CURRENT_DESKTOP=ubuntu:GNOME
exec /etc/xrdp/startwm.sh
EOF
chmod a+x /etc/xrdp/startubuntu.sh
fi
Now setup the script for the session.
sed -i_orig -e 's/startwm/startubuntu/g' /etc/xrdp/sesman.ini2f. Rename drives to shared-drives, setup allowed users.
sed -i -e 's/FuseMountName=thinclient_drives/FuseMountName=shared-drives/g' /etc/xrdp/sesman.ini
sed -i_orig -e 's/allowed_users=console/allowed_users=anybody/g' /etc/X11/Xwrapper.config
2g. Now we need to exclude the vmw module if necessary.
echo "blacklist vmw_vsock_vmci_transport" > /etc/modprobe.d/blacklist-vmw_vsock_vmci_transport.conf2h. Next up, make sure the kv-sock gets loaded. Dire consequences exist if we don’t do this. This is an, if necessary, type of addition similar to excluding the vmw module.
echo "hv_sock" > /etc/modules-load.d/hv_sock.conf2i. Finally setup and configure the policy for xrdp sessions. At the end setup for startup, then after all this reboot.
cat > /etc/polkit-1/localauthority/50-local.d/45-allow-colord.pkla <<EOF
[Allow Colord all Users]
Identity=unix-user:*
Action=org.freedesktop.color-manager.create-device;org.freedesktop.color-manager.create-profile;org.freedesktop.color-manager.delete-device;org.freedesktop.color-manager.delete-profile;org.freedesktop.color-manager.modify-device;org.freedesktop.color-manager.modify-profile
ResultAny=no
ResultInactive=no
ResultActive=yes
EOF

systemctl daemon-reload
systemctl start xrdp
Did you reboot? Make sure to reboot, as I have myself forgotten and spent wasted time trying to sort out why things weren’t working when the appropriate services and all had not been restarted to have xrdp and such restart and initiate running under the appropriate state that a reboot allows.
So reboot!
3. Configure the VM Server
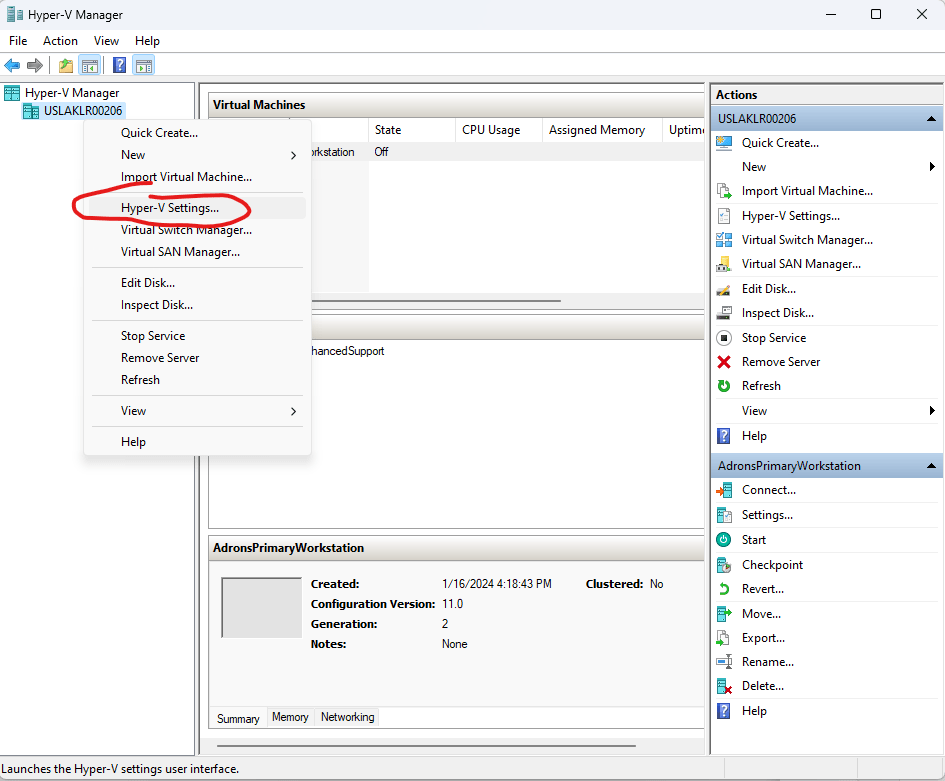
But that’s not all, we also need to configure the host and VM a bit more. Open up the Hyper-V MMC manager again and open the settings for the Hyper-V Server.
3a. In this dialog select the Enhanced Session Mode Policy and ensure the Allow enhanced session mode check box is checked.

3b. Below that under the user section, click on the Enhanced session Mode, and there too make sure Use enhanced session mode is selected.
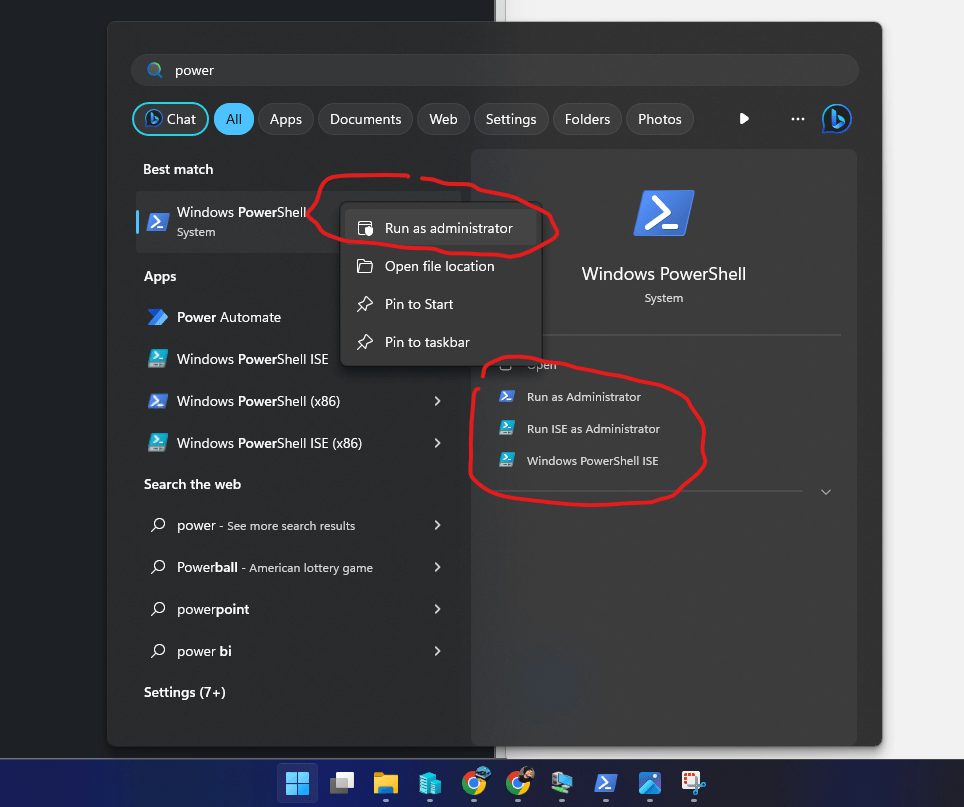
3c. Next up, yes there’s more, open up a PowerShell session in the host Windows machine in Administrator mode. Do this by clicking on the Start button on the taskbar (Windows button?), and type in “PowerShell” (or just “Power” or enough characters so that Windows PowerShell shows up). Then right click on the Windows PowerShell item. Select Run as administrator, or you can click on one of those options over to the right. The right click and select Run as administrator is available anywhere you have access to the executable or the direct link to it, but not via any shortcut of the executable.
3d. Now execute the following commands to ensure all the enhanced prerequisites for the machine are set. You can, before running the commands just check to see if they’re enabled with the first command in this list of commands.
Get-VMHost | select Name, EnableEnhancedSessionMode

Set-VMHost -EnableEnhancedSessionMode $true
Set-VM -VMName AdronsPrimaryWorkstation -EnhancedSessionTransportType HvSocket
I believe, at this point, all the steps are covered and you can then reboot the VM again and gain access to the Enhanced which provides a properly performant Ubuntu 22.04 LTS dev experience via VM!
You must be logged in to post a comment.